How to Draw a Realistic Pumpkin Step by Step Tutorial
This step by step tutorial explains how to draw and shade a realistic looking pumpkin with pencil drawing examples for each step.
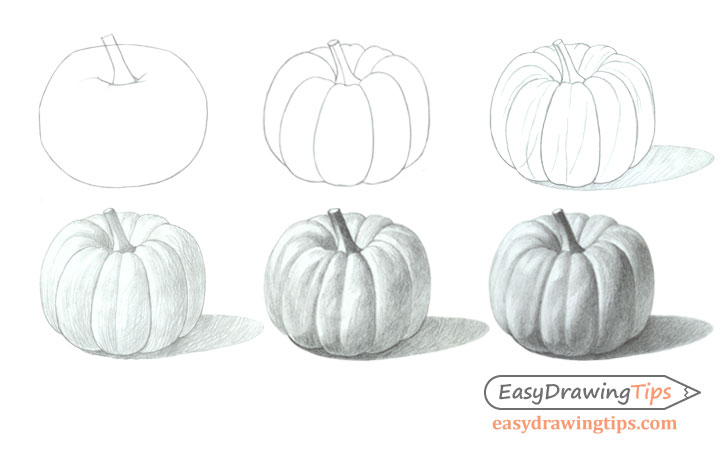
Step 1 – Draw the Overall shape of the Pumpkin
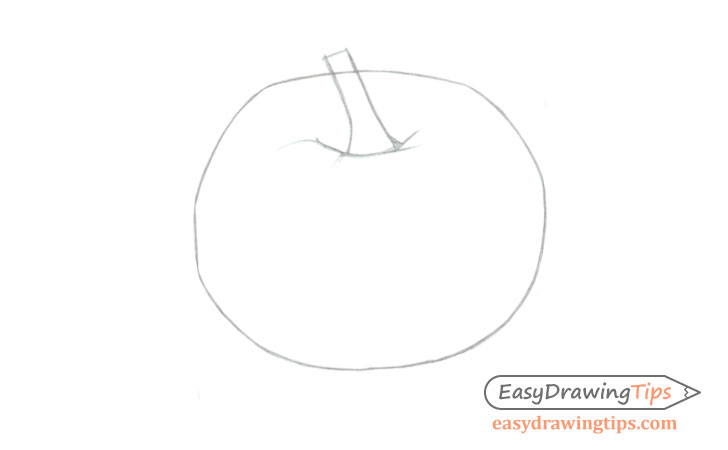
Begin the pumpkin drawing by first getting it’s major shapes. In this case the pumpkin itself and the stem.
Pumpkin usually tend to be shaped like a sort of sphere with a squashed in top and bottom.
This shape drawing can be fairly rough and can omit the smaller bends and curves in the shape. The goal is to have the correct overall shape first.
Step 2 – Add the Details
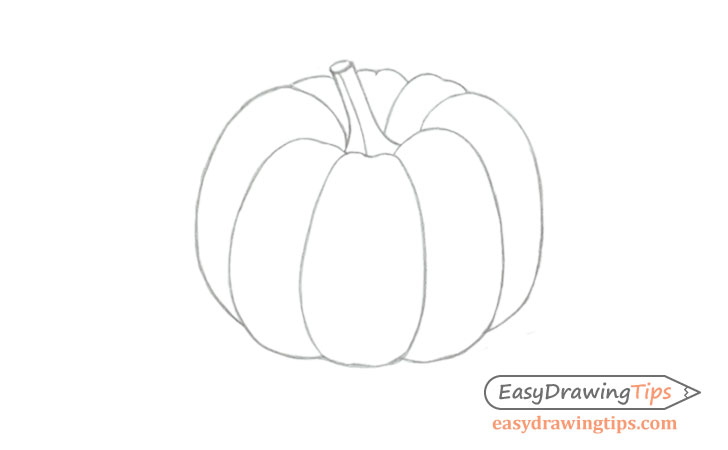
After you have the main shape of the pumpkin you can add in the smaller details such as the divisions and curves.
Draw these right over top of the example from the previous step and erase whatever parts you need to in order to have a clean line drawing.
Step 3 – Analyze the light and shadows
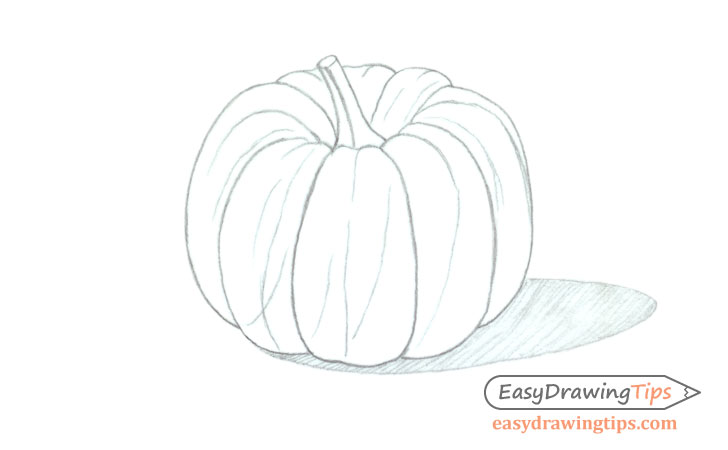
In this case the lighting will be coming from the top left of the drawing so the shadows and drop shadow will be on the right side.
Keep in mind that there will also be light reflecting from the surface the pumpkin is on.
When analyzing the shading of a pumpkin like this one you can first think of it as a sphere. In a sphere that is lit in a manner similar to the pumpkin there will be a steady transition from light to dark and then to light again from the reflected light. Please note that the area lit by the reflected light will usually be much darker then the area lit by the main light source.
For an example of shading a sphere and other based 3d shapes you can see:
How to Shade Basic 3D Shapes Tutorial
The added challenge of shading a pumpkin vs shading a sphere is that each of the curved divisions of a pumpkin will also have it’s own light to dark transition in addition to the overall shape so you have to account for both.
Another thing to note is that the indented area at the top will basically have a reversed shading going from dark to light from the left area of the drawing to the right.
You can draw some lines to indicate the positions of the darkest shaded areas of the pumpkin to make it a little easier to shade. You can also draw in the shape of the drop shadow.
Step 4 – Begin Shading
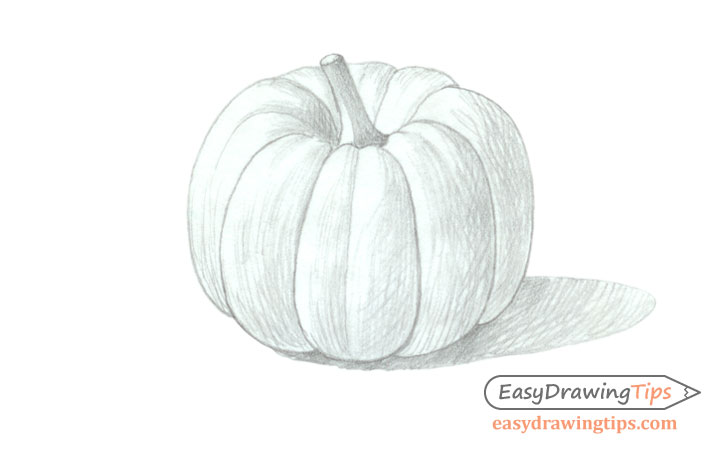
Begin shading the pumpkin by first shading the darker areas. Try and apply a set of strokes that follows the shape of the pumpkin with another set of strokes in a slightly different direction to create a cross hatch.
Be sure to make fairly light strokes for this step of the drawing process (you can intensify the shadows in later steps).
For some examples of different kinds of shading strokes see:
Shading Techniques and Stroke Types Drawing Tutorial
Step 5 – Refine the Shading
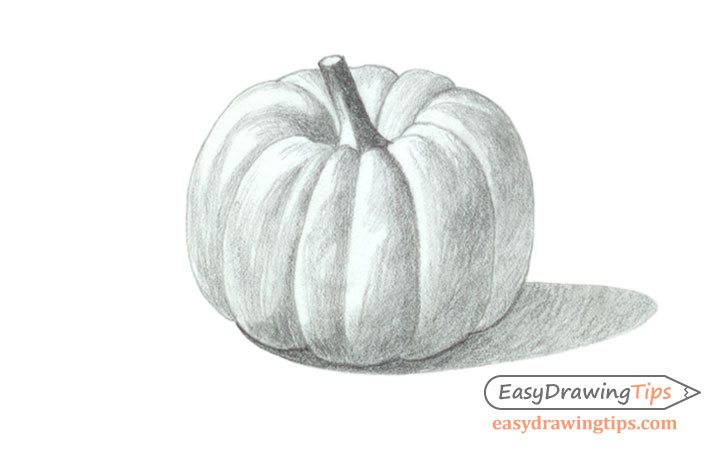
You can refine the basic shading from the previous step by darkening the “in shadow” areas, the drop shadow and the stem of the pumpkin.
Please note that the stem will usually be naturally darker then the pumpkin which means that it’s shaded areas should be even darker then those of the main shape.
Step 6 – Finished Pumpkin Drawing
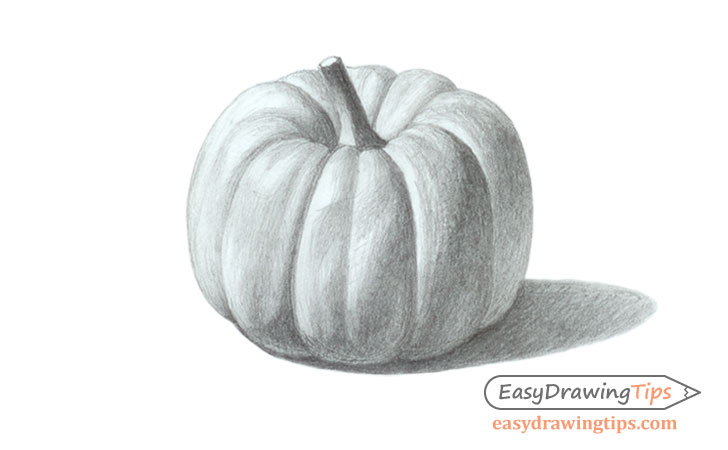
Smooth out the gradients and darken the shaded areas of the pumpkin even further to create a finished drawing of the pumpkin. If you find some areas are too dark you can erase some of the shading to make brighter highlighted areas.
Conclusion
Drawing an shading a pumpkin can be a great way to practice shading 3d looking objects as it’s not an overly complex shape but it’s not a very simple one either.
For another similar tutorial see:
- How to Draw an Eggplant Step by Step
- How to Draw a Realistic Watermelon Step by Step
- How to Draw a Cake Slice in 10 Steps

