How to Draw a Fox Step by Step
This tutorial shows how to draw the head and face of a fox in fifteen steps with detailed illustrated examples and instructions.
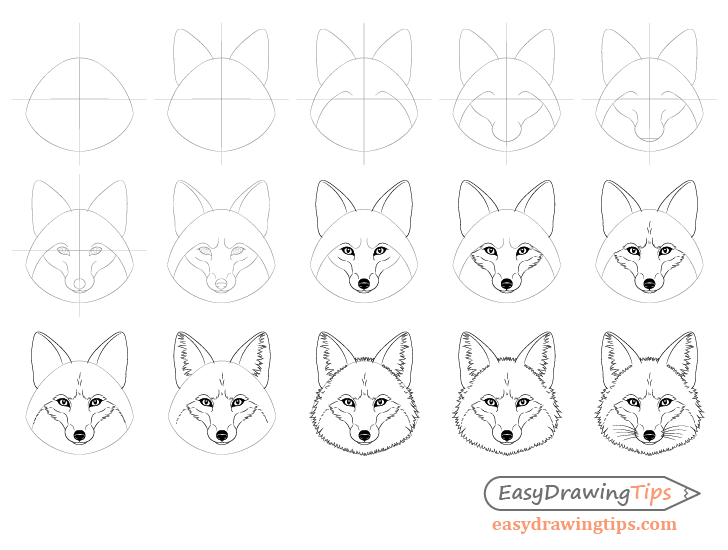
Creating a realistic looking line drawing of a fox’s head and face can be quite difficult. This tutorial shows how you can simplify the process and makes it more manageable by starting with fairly basic outlines and working your way down to the more complex details. In addition to being helpful for this particular tutorial such a method can be very useful to drawing in general.
If you are going to be following along using pencils and paper (recommended) you should start with very light and easy to erase lines. The examples have been made darker just so that they are easier for you to see.
Step 1 – Draw the Shape of the Fox’s Head

Begin the drawing by making two straight intersecting lines, one vertical and one horizontal. Be sure that these are actually straight as the rest of your drawing can be off if they aren’t.
The vertical line will set the middle of the head and the horizontal line will be at the level of the eyes. The reason for making these is to act as guides that can help you insure that the drawing does not get skewed to one side and that different parts of the face don’t get misaligned.
For more suggestions on good drawing practices see:
Beginner Guide to Learning to Draw
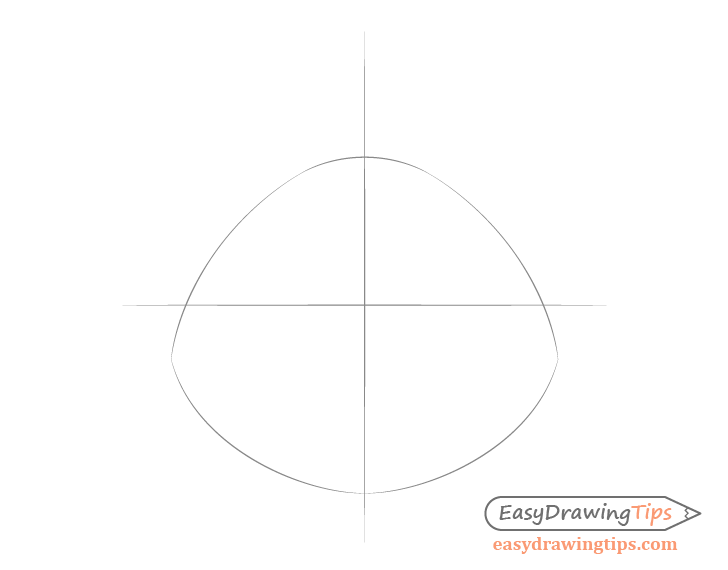
Around the guide lines draw a highly simplified outline of the the fox’s head. Position it more towards the bottom in relation to the horizontal line.
The head’s overall shape can be defined with two curves, one for the top and one for the bottom (as shown in the example). When drawing these be sure to make the upper half taller than the lower one.
Step 2 – Draw the Ears

Onto the outline of the head add the outlines of the ears. Similar to the head also simplify them to not include any of the inner details or smaller bumps and curves.
Draw the ears pointing very slightly away from each other. Make them wider near the head and narrower as they go out with rounded ends. You can also make each ear curved slightly inwards at the very base.
Step 3 – Outline the Fur Pattern
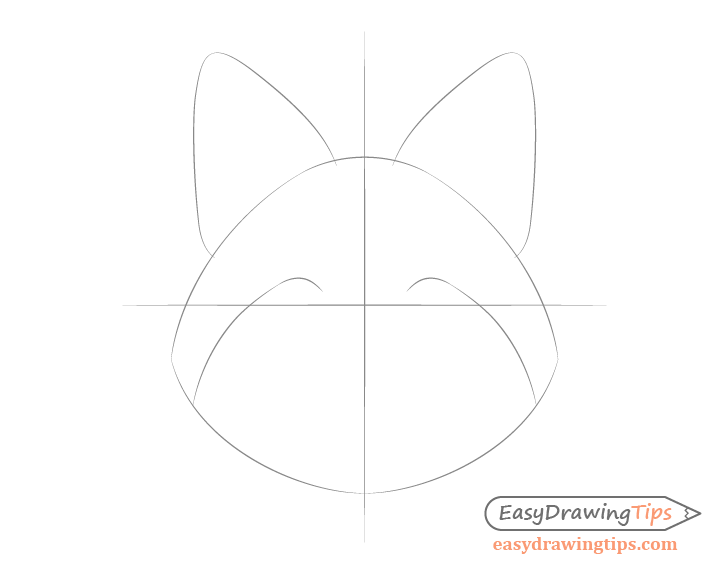
Inside of the face add the lines to define the fox’s fur pattern. These will transition from the lower part of it’s face into the eyebrows (as shown in the example).
The “fur pattern” refers to the split between the orange fur that foxes of this type generally have on top of the head and the white fur they have at it’s bottom.
Step 4 – Outline the Snout & Cheeks

Add the outline of the snout starting with it’s bottom most portion (the somewhat rounded area around the nose).
Although foxes have fairly long snouts (like dogs and wolves), in the example the fox is looking pretty much directly at the viewer. This means that the snout is being viewed from the front and will appear shorter than if for example it was pointing downwards. Keeping this in mind you can define it’s sides with a pair of fairly short curved lines.
The curves of the snout should then transition into the cheek areas. You can define these with another pair of lines that curve in the opposite direction (compared to the previous pair).
For drawing the face of a dog and a wolf in a similar manner see the following:
Step 5 – Position the Mouth & Define the Upper Shape of the Snout
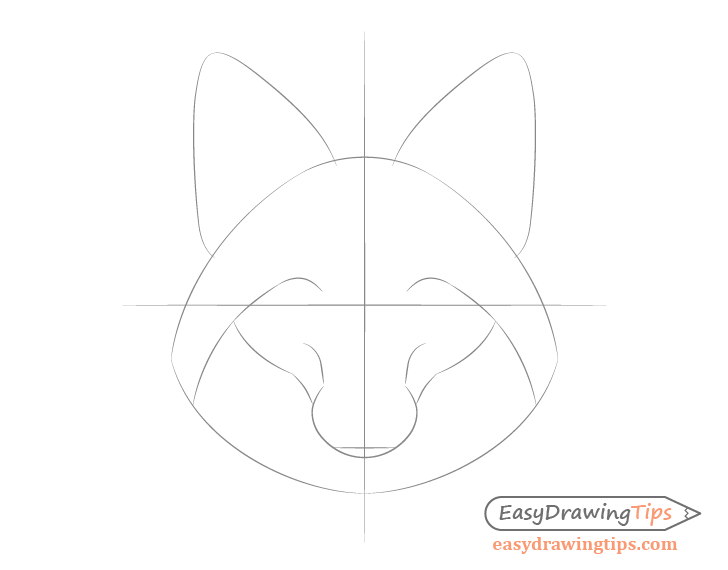
Towards the bottom of the snout draw a straight horizontal line to set the placement of the mouth. Afterwards, also define the upper area of the snout by adding another pair of curves running up from the ends of it’s middle section.
Step 6 – Draw the Facial Features
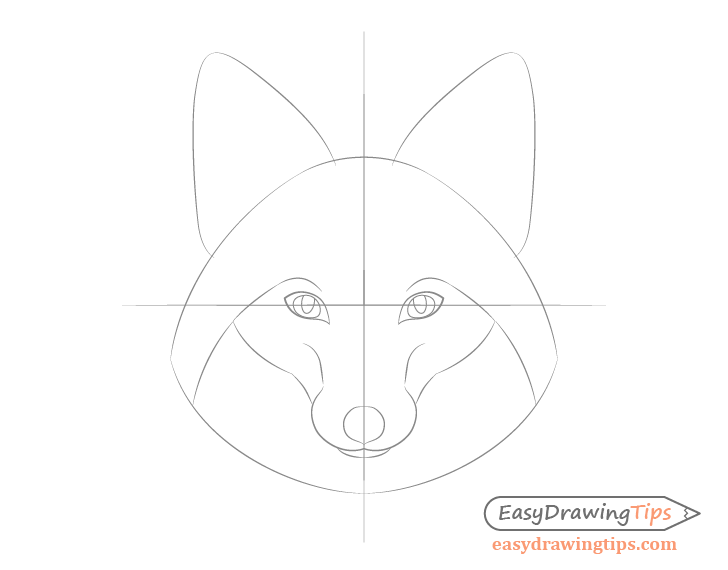
Draw an outline of the eyes, nose and the organic shape of the mouth. You can erase part’s of the lines from previous steps as needed when doing this.
Drawing the Fox’s Eyes
Place the eyes using the horizontal line drawn in step one as a guide. It should run roughly through their middle.
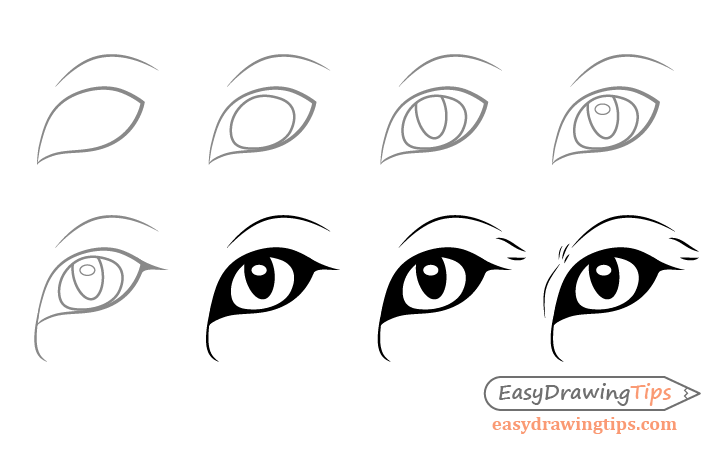
You can see a step by step drawing of the fox’s eye from start to finish in the illustration above. However, at this step of the tutorial you only need to go as far as the third stage of the drawing. You can come back to the rest as reference for later steps.
First, define each eye’s outer shape. Give these areas curved and pointy bottom tips that are very characteristic of a fox. Also, draw the eyes angled downwards towards the middle of the head. Next, inside each of these outlines define the visible parts of the irises.
For the last part of each eye add a pupil. Just like cats foxes have elliptical pupils. You can define them as small angled ovals that are partially covered by the upper eyelids.
For drawing an actual cat see:
How to Draw a Cat Step by Step
Drawing the Fox’s Nose
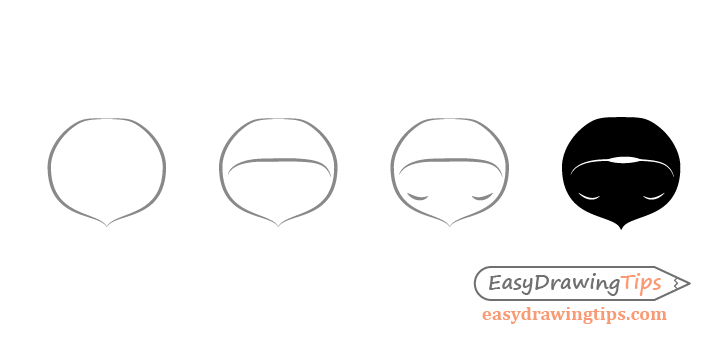
The nose has a bit of an irregular shape. When viewed form this angle it’s overall outline will appear almost but with a pointy tip at the bottom and a slightly flatter area at the top. Draw it’s outline as shown in the first example above but leave the inner details such as the nostrils for the next steps (come back to this illustration for reference if needed).
Drawing the Fox’s Mouth
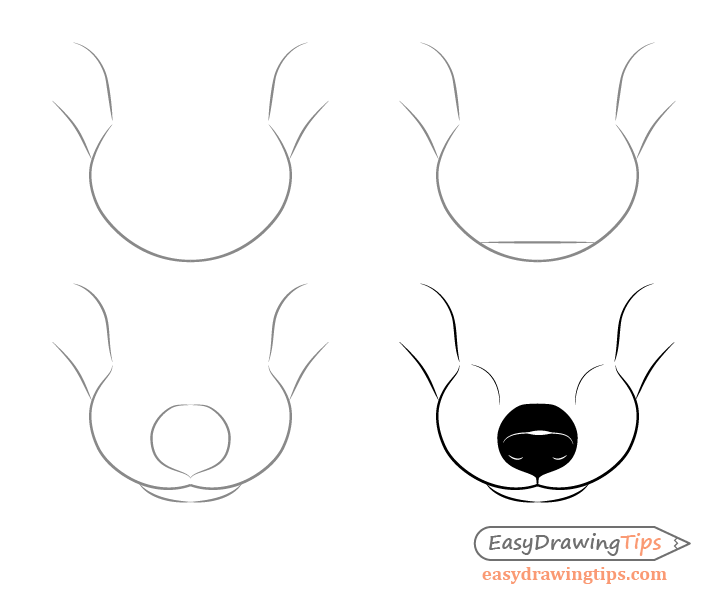
Finally, you can see the fox’s mouth drawn step by step as part of the snout. Again, for this step of the drawing you only need to go until the third stage in the example. However, you can refer back to the last example once you get to later stages of the tutorial (if you want to see a more close up version of this part of the drawing).
Define the upper part of the mouth as a pair of curves (with a split in the middle) that transition into the the shape of the snout. Define the bottom jaw as a single curve.
You can erase the positioning part’s of the snout’s outline from the previous steps when adding this part of the face.
Step 7 – Draw the Small Details of the Face
Finally add the last set of details to finish the basic line drawing of the fox’s head.
These will be as follows:
- The outer sides of the ears and the inwards curves on their sides (erase parts of the previous outlines when adding these)
- Inner curves of the eyebrows
- Reflections inside the eyes (small oval shapes)
- Curves running from the inner and outer tip of the eyes
- Curves going from the upper part of the nose towards the snout
- Lower edges of the nostrils and upper edge of the nose (keep these lines very light)
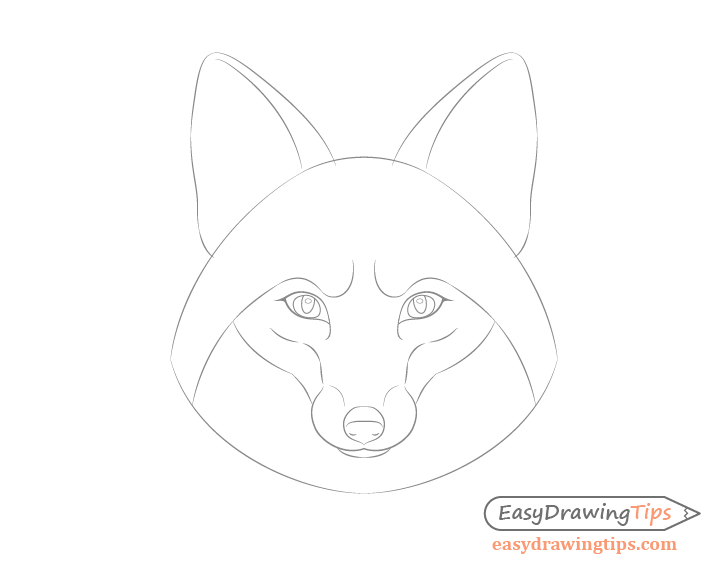
Step 8 – Shade/Darken the Facial Features
If you are happy with the way your drawing looks thus far you can begin darkening some of the lines by tracing over them. You can also fill in the darker parts of the face with dark pencil shading.
The lines/parts that you will want to darken are ones that will not need to be changed in the later stages of the drawing.
Do the following:
- Darken the outlines of the ears
- Shade in the eyes (leave the irises and reflections white)
- Darken most of the lines around the eyes (don’t darken the inner parts of the eyebrows)
- Darken the lines that defining the snout
- Shade in the nose but use the lines from the previous step as a guides to create white reflections that will define it’s nostrils and upper edge
Because foxes have black noses shading one can be tricky. Any details defined by regular pencil lines can simply be lost in the dark shading. For this reason you can do the trick shown above of using reflections to define it’s shape. Shade around these areas to create white lines/spots that are clearly visible on the dark background. Not only will this allow you to keep the details of the nose but it will also make it appear shiny and moist (as animal noses often are).
You will also notice that only the bottom edges of the nostrils are defined in this way. The reason for this is that light tends to come from above so the upwards facing edges will be the ones that tend to catch it (lower edges face up and upper edges face down).
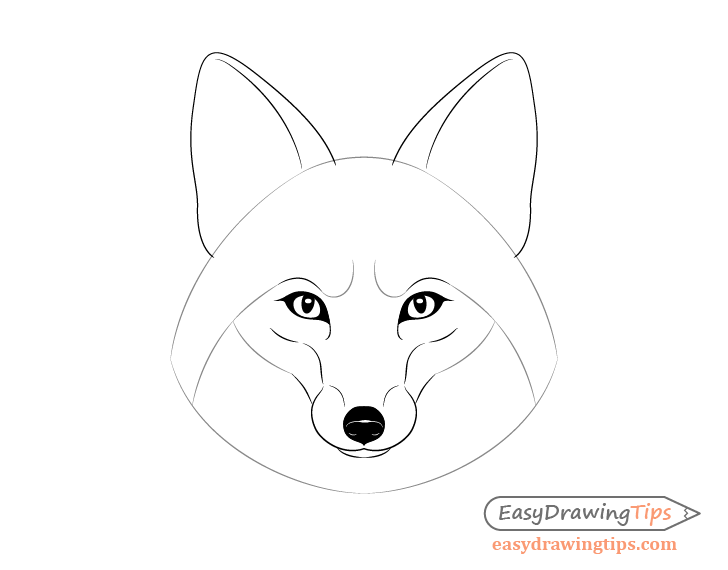
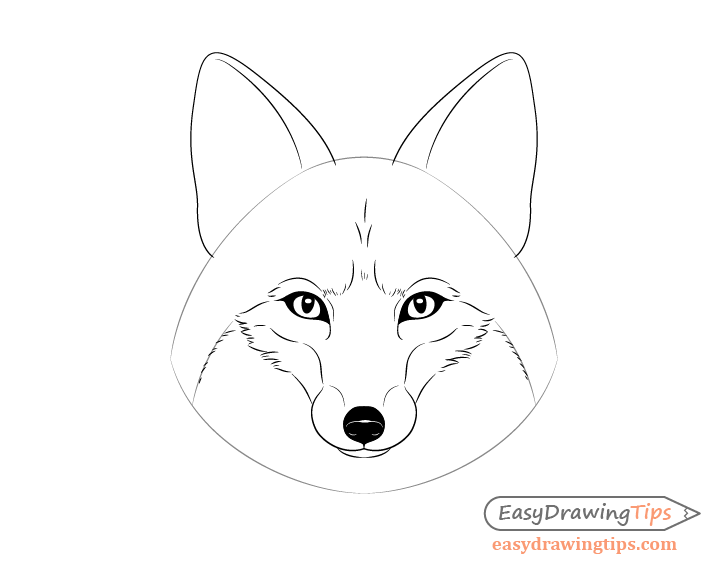
Step 9 – Draw the Fur Along the Cheeks/Eyes
Add some fur along the cheeks and just a tiny bit near the outer sides of each of the eyes. To create this make a series of lines that form clumps of somewhat varying sizes and shapes as shown in the example.
If you are feeling confident you can define the fur with darker lines right away so that you don’t need to trace over them later. Once you’ve added the fur clumps you can erase the outlines that were used to define them in earlier steps. Either do this with the edge of a regular erase or use a kneaded one.
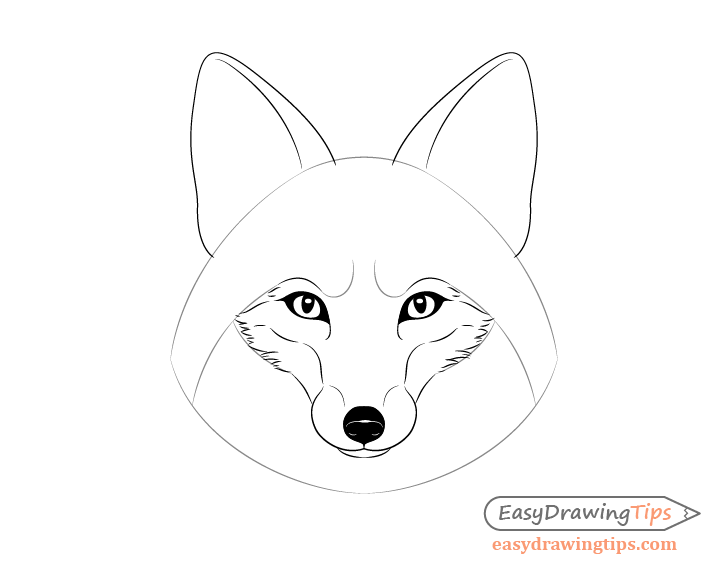
Step 10 – Draw the Forehead Fur
Add the fur along the eyebrows and forehead. Make the lines that define the fur along the lower ends of the eyebrows much shorter than those used for the clumps along the cheeks.
Erase the lines that defined the eyebrows in the previous steps after adding the fur.
Step 11 – Draw the Fur Pattern Details
Add some fur along the face pattern lines that run down from the tips of the cheeks. You can again make these clumps fairly short.
Erase the solid lines in between the fur once done.
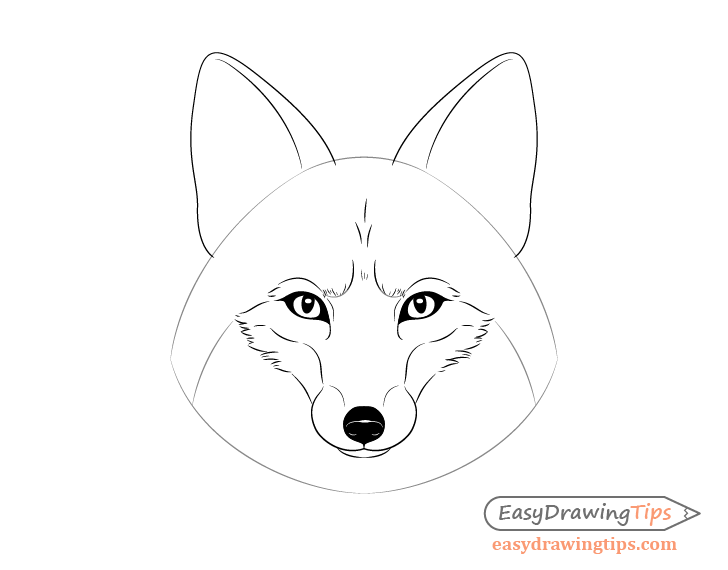
Step 12 – Draw the Ear Fur
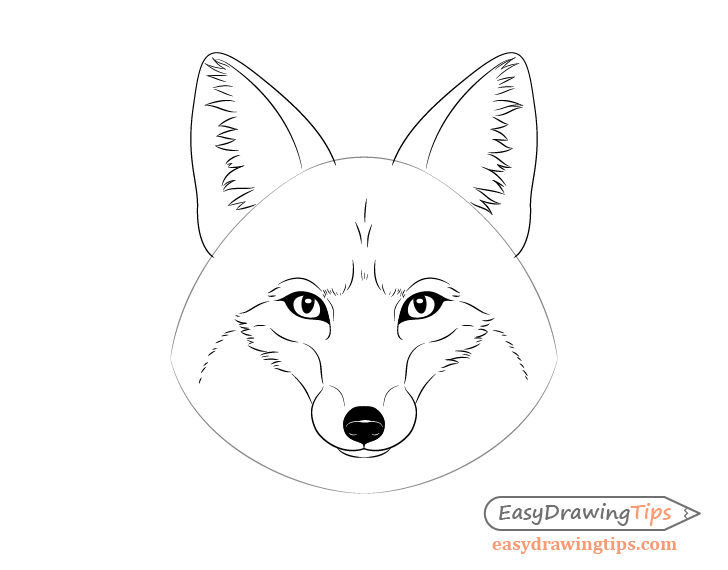
Foxes tend to have fairly long fur growing out from their ears. Show this by drawing some fairly large clumps inside the outline of each ear as shown in the example.
Step 13 – Draw the Mane Fur
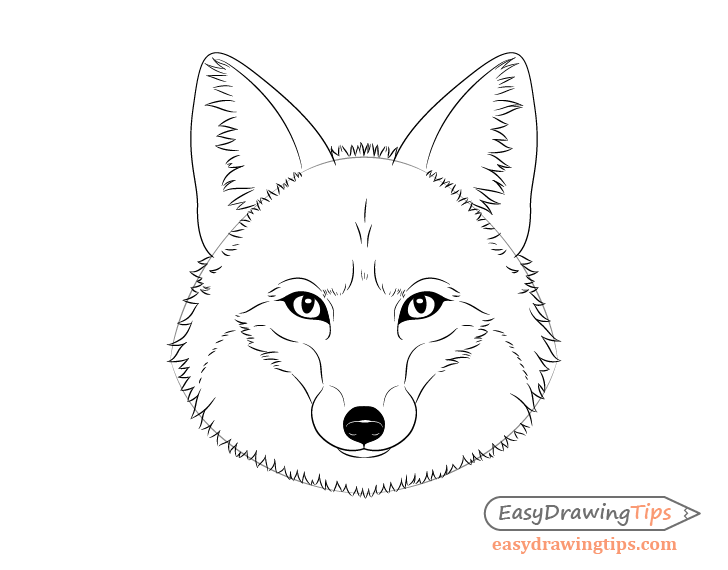
Finally add the fur clumps along the mane and the general outline of the head.
Make these smaller/shorter near the top and bottom of the head and larger and longer near the sides. Erase the lines that were used to outline of the head in step one once done.
Step 14 – Clean up the Drawing
At this stage your drawing should be nearly finished. Make sure that everything looks good and clean up any left over outlines if needed.
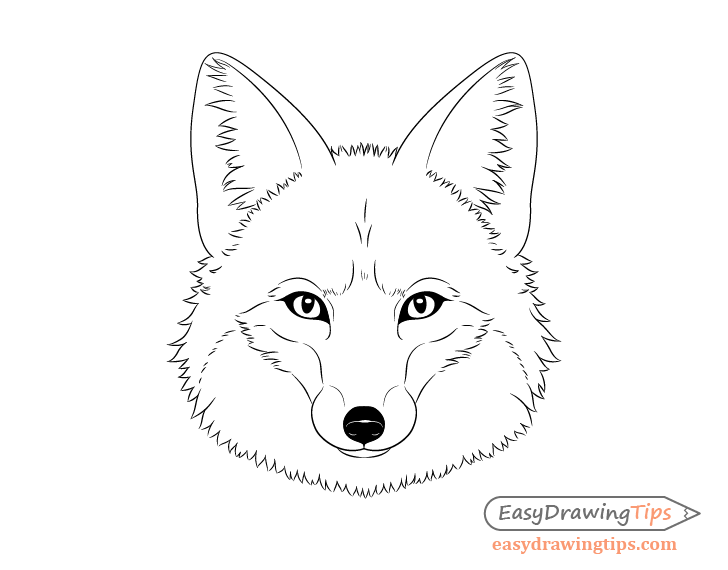
Step 15 – Add the Whiskers & Finish the Fox Drawing
For this final step add the fox’s whiskers. Try and draw them thicker near the base and thinner as they go away from the snout. You can do this by making quick lines where you initially press harder on the pencil and then quickly relax your hand as you go.
Depending on how confident you are in doing so you can first practice making a few of these on a separate piece of paper before doing so on the drawing.
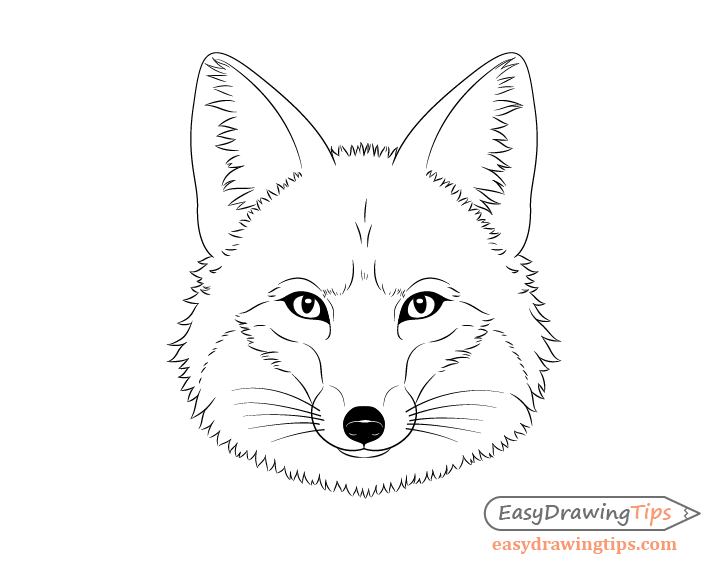
Also, make the whiskers longer towards the top and shorter as they go down. Once done adding them you should have a finished drawing of a fox’s head.
Conclusion
This tutorial shows how to make a realistic looking line drawing of a fox’s head and face using a logical and easy to follow step by step approach.
When working on a complex drawing such as this one it’s a good idea to try and think of it as whole. The goal is to first get an overall form that is characteristic of whatever it is you are trying to draw (in this case a fox) by starting with simplified outlines of it’s major parts. You can than gradually refine the drawing (as was shown in the examples) and add the smaller details. Approaching art in such as way can help you portray things correctly (looking like what they are actually supposed to be). It can also help you avoid mistakes and to reduce the amount of backtracking needed to make corrections.
For example, in the final drawing the outline of the fox’s head is pretty much defined by the little fur clumps that were drawn along the outline made in the first step of the tutorial. If the outline was not done and you were to start drawing clumps with no guide to follow you would be more likely to “go off course”. This could result in a drawing where the fox’s head is crooked or misshaped which in turn could lead to having to erase all or a large part of those time consuming details. Making revisions to the outlines on the other hand is quite easy as all you have to redraw is one or two curves.
If you like these kinds of in depth drawing guides interesting and informative also be sure to look at the following:
- How to Draw a Lion Full Body Step by Step
- How to Draw an Eagle Head Step by Step
- How to Draw the Body Step by Step