How to Draw a Cake Slice in 10 Steps
This tutorial shows how to draw a slice of cake with easy to follow step by step line drawing and pencil shading examples.

As you can see in the above preview, the tutorial starts with the basic shape of the slice and shows how to gradually draw all of it’s fillings and toppings. It then shows how to shade the different areas of the cake to create a drawing that is not overly complicated but still looks realistic.
The tutorial can be particularly good if you are looking to practice shading an object that has a good mix of light and dark ares (like the different toppings and layers of the cake).
The entire drawing is done using pencil and paper. It you are going to be following along it’s recommended that you do the same and start with light and easy to erase lines.
Step 1 – Outline the Main Shape of the Cake Slice

Begin by outlining the overall shape of the cake slice as shown above. An easy way to do this is to start with the side facing towards the viewer. Draw this part taller near the front and make it slightly narrower as it goes into the background to show perspective. Next, draw the curve of the back of the slice. Once again make it a little narrower as it goes into background. Finally connect the two at the top to finish the outline.
As cakes are not perfect in shape you don’t have to worry about your lines being perfectly straight. It can actually look a little more natural if they aren’t.
For more on perspective drawing see:
Perspective Drawing Tutorial for Beginners
Step 2 – Draw the Cake Layers
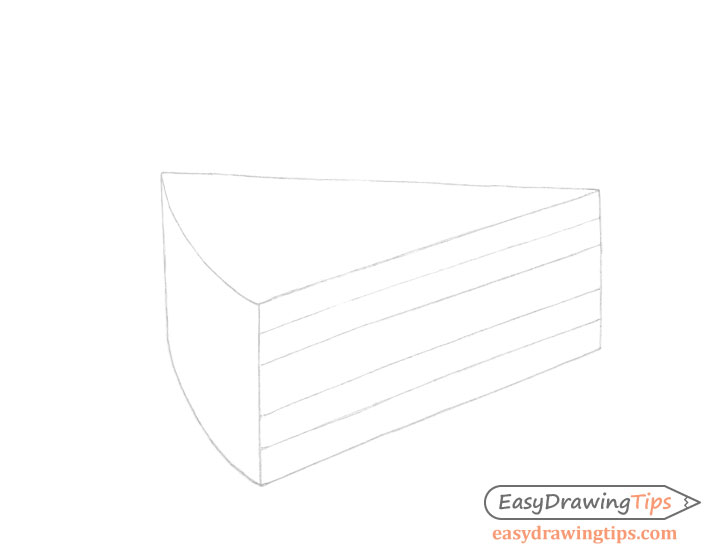
Once you have the main shape of the slice outlined divide it’s side into it’s various layers. In this case it has a thick one in the middle and two thinner layers below and above it. At this stage of the drawing define the thin layers with just a single line each. These lines will act as guides in a later step (when shading).
Step 3 – Draw the Cherry and the Frosting

On top of the cake add the frosting and the cherry. Draw these right over top of the slice’s outline and erase the parts that they overlap once done.
To start make a simplified drawing of the overall shapes of the frosting without the smaller details. You can think of the frosting along the edge of the slice as a flattened and slightly curved tube and that below the cherry as two doughnuts stacked on top of one another (a larger one on the bottom and and a smaller one on top).
For more on drawing cherries see:
How to Draw Cherries Step by Step
Step 4 – Draw the Details of the Frosting

Using the shapes from the previous step as guides draw the smaller bends and curves of the frosting. You can erase parts of their outlines as needed when doing so.
Step 5 – Outline the Main Shadow Cast by the Slice

For the last step of the line drawing outline the shadow cast by the cake slice on the surface it’s sitting on. In this case the light is coming from the upper right of the cake and slightly to the front of it. This means a fairly short shadow is cast to the left and slightly behind it.
Step 6 – Shade the Different Sides of the Slice

Shading the cake slice is not particularly difficult. One thing you should keep in mind though is that in this case the dark and light parts of the cake will sometimes override the lighting. For example the top of the slice is darker because of darker frosting along it’s surface. The curved part of the slice is much darker not only because it’s the side facing away from the light but also because it’s made of a darker ingredient (chocolate).
For this particular drawing you can pretty much blend your strokes to the point where they are barely visible. Shade the three main (visible) sides of the slice as described above and move on to the next step.
To learn more about different stroke type sand shading techniques see:
Shading Techniques and Stroke Types Drawing Tutorial
Step 7 – Shade the Layers

Darken the different layers of the cake as shown in the example. Start with the thicker one in the middle and make it about as dark as the chocolate along the back of the slice. Next, using the lines from step two as guides create the two thinner layers of filling along them. Make these slightly darker than the one in the middle.
Step 8 – Shade the Cherry

As already mentioned, in this case the light is coming mainly from the upper right of the slice. To show this shade the cherry to be darker along it’s bottom and left side and lighter along the top and right side with a gradual transition between the light and dark areas. Also, leave a lighter area around it’s bottom to show the light colored frosting reflecting from it’s smooth surface and a very light (almost white) spot along it’s upper right to show a reflection from the main light source.
Step 9 – Add the Shadows Cast by the Slice & Frosting

Shade the main shadow cast by the cake slice and add a couple of smaller shadows cast along it’s top by the frosting. Make each shadow a little darker near it’s base and lighter as it goes out (may be harder to see with the smaller shadows).
Step 10 – Shade the Frosting

Finally, shade the frosting. Do this in two parts. First, shade it’s major shapes as a whole by darkening their bottoms and left sides. The doughnut shaped frosting should also have a particularly dark area along it’s upper left as the cherry will cast a shadow there. After darkening the main shapes also darken the left sides of the little edges of the swirls that run along them.
To finish you can better blend and darken all of the shading until you feel it looks good.
Conclusion
This tutorial shows how to create a realistic looking drawing of a slice of cake (with a cherry on top). This is done by first making a clean and simple line structure and then by applying shading to it in several layers. As is mentioned in many other tutorials here on EasyDraiwngTips, a good approach to drawing is to start with the largest and most important parts of an object and to gradually work down to it’s smaller details.
Hopefully you’ve found this guide helpful and the step easy to follow. For more similar tutorials also see the following:
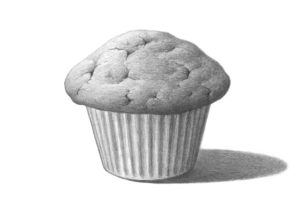
- How to Draw a Muffin Step by Step
- Egg Step by Step Basic Shading Tutorial
- How to Draw a Croissant Step by Step