How to Draw a Young Girl in 12 Steps (With Proportions)
This tutorial shows how to draw a girl’s face with a detailed and easy to follow step by step breakdown. It includes proportions, line drawing and shading examples.
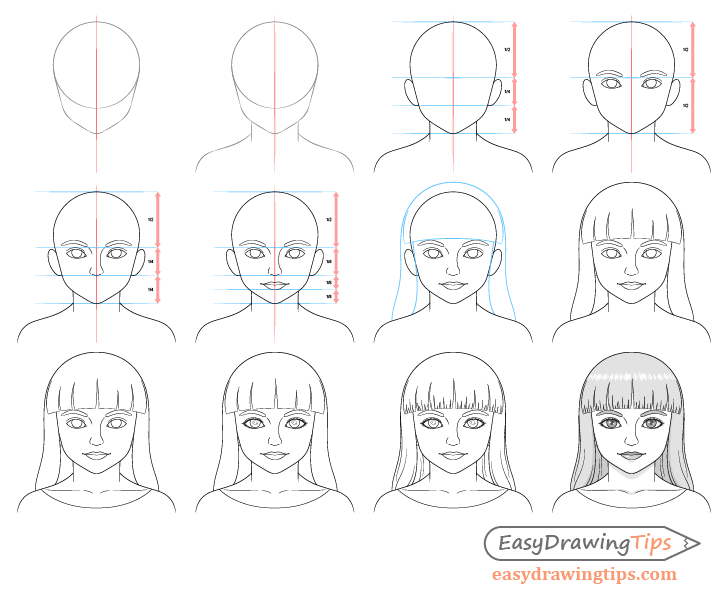
You can see a preview of the main drawing stages in the image above but there will be additional examples in some of the steps.
Drawing faces can be a challenge even for fairly experienced artists (kids in particular). To make things easier this tutorial provides a somewhat simplified (beginner friendly) examples with proportions that can help you create a young looking face. It also gives tips on good overall drawing practices that
It’s recommended that you start in pencil and make fairly light lines as you will need to erase parts of the drawing in a few of the steps. The lines in the examples haves been made darker just so that they are easier for you to see.
Step 1 – Draw the Girl’s Head
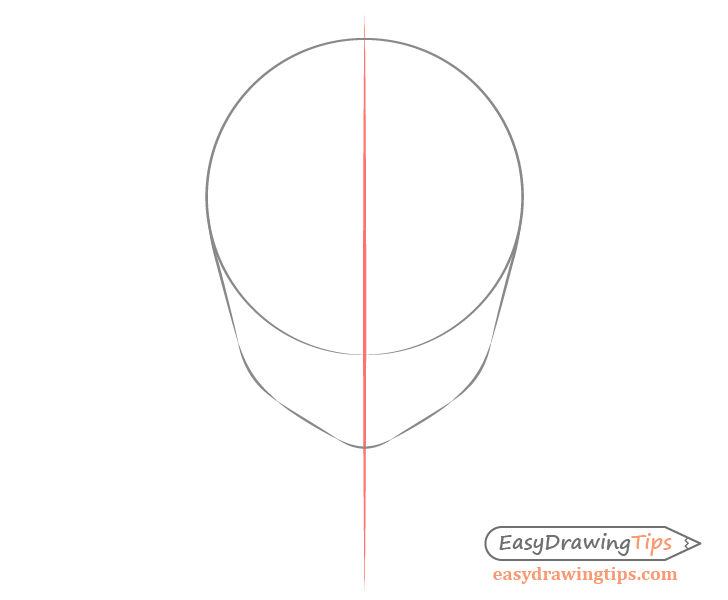
Before starting the head make a straight vertical line through the middle of your page. This center line will act as a guide to help you see that the drawing is not skewed or tilted towards one side and that both it’s halves are relatively even in width. Toward the upper end of this line draw a circle for the top of the head. Be sure to also leave some room above it for the hair (added in a later steps).
The reason you want to draw the whole circle instead of just the upper half is to make it easier to see if it’s actually round.
Going down from the circle add the lower part of the face. As this is a child’s face this section will be fairly short (kids generally have rounder faces than adults). The shape of the lower half of the head is defined by the broken up line segments in the example. first you will have two relatively straight parts angled towards the cheeks, next you will have a pair of curves (the cheeks) followed by another pair of relatively straight sections angled towards the chin and joined by it’s curve.
Once you have the lower half of the face drawn out you can erase the bottom part of the circle.
Step 2 – Draw the Neck & Shoulders
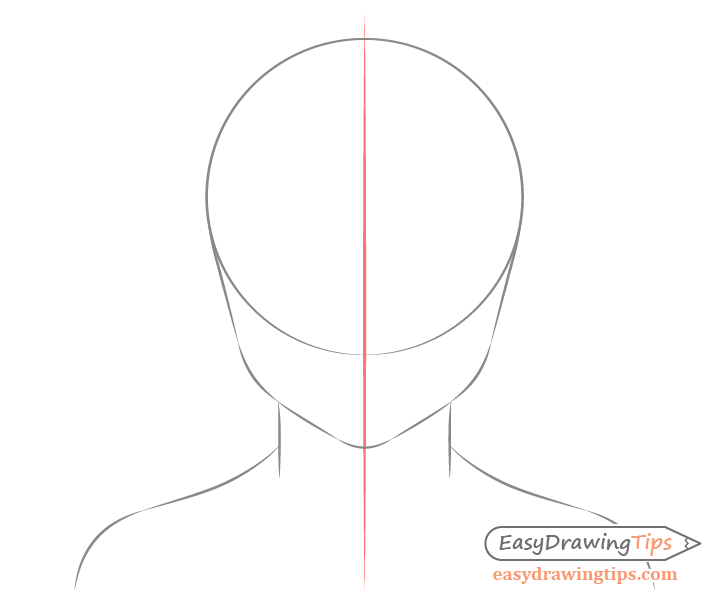
Going down from the head add the neck followed by the shoulder muscles and shoulders (as shown in the example). The lines that define the neck can be fairly straight followed by the slightly curved shoulder muscles and rounded shoulders. Also keep in mind that as this is a young girl the shoulders should be relatively narrow in relation to the head.
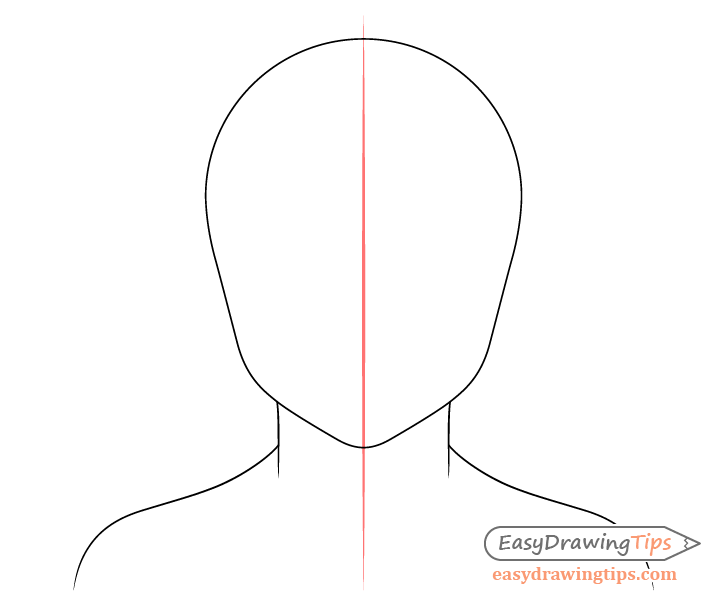
Your drawing should look something like the above once done. Again remember to keep your lines fairly light as you will need to erase some of the head’s outline later on.
Step 3 – Draw the Ears
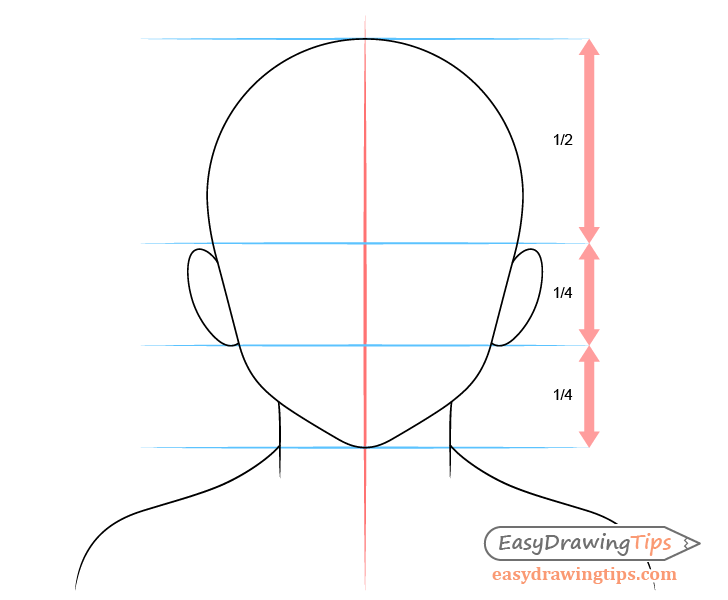
Position the ears with their upper ends slightly below the vertical halfway point of the head (1/2) and their bottoms one quarter of the way up from the chin (1/4). For this particular drawing you do not need any of their inner details as the ears will most by covered by the hair (in later steps).
Step 4 – Draw the Eyes & Eyebrows
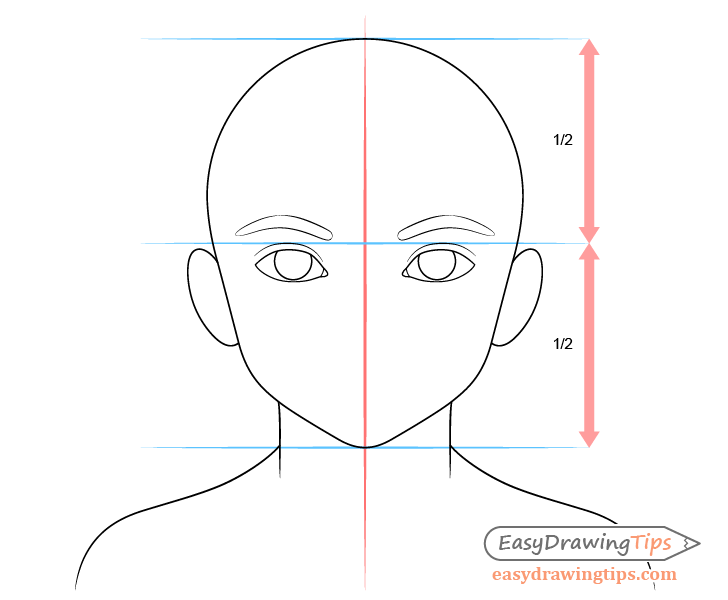
Kid’s generally have eyes lower down on the head then adults. For this particular drawing you will want to place them below the horizontal halfway point.
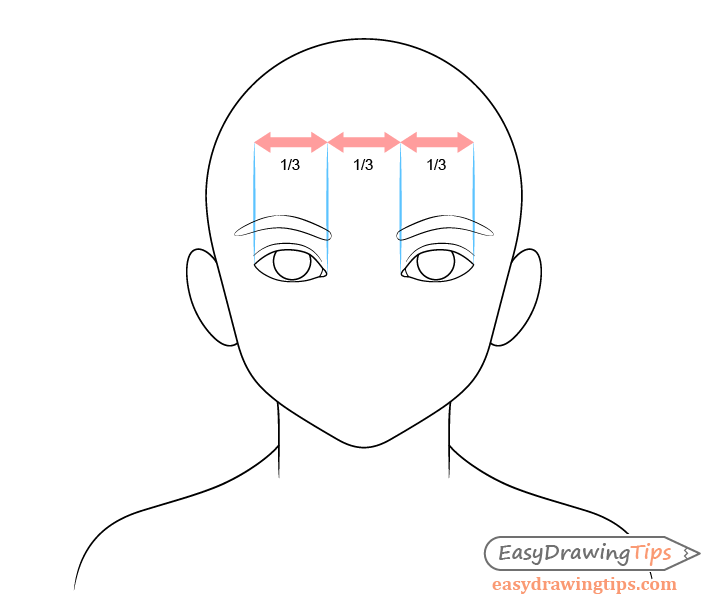
Make the eyes fairly large and space them far enough apart that you can fit a third eye in between them. In this particular drawing the eyes will be very slightly exaggerated in size to further emphasize that this is a child and to give the girl a cuter appearance.
Very slightly above the eyes give a hint of the eyelids with a pair of curved lines (one above each eye) that appear slightly flattened in the middle. Slightly higher up add the eyebrows. Once again their overall shapes should be somewhat like a curve but this time with a bit of a sharper “break” near the middle.
Step 5 – Draw the Nose
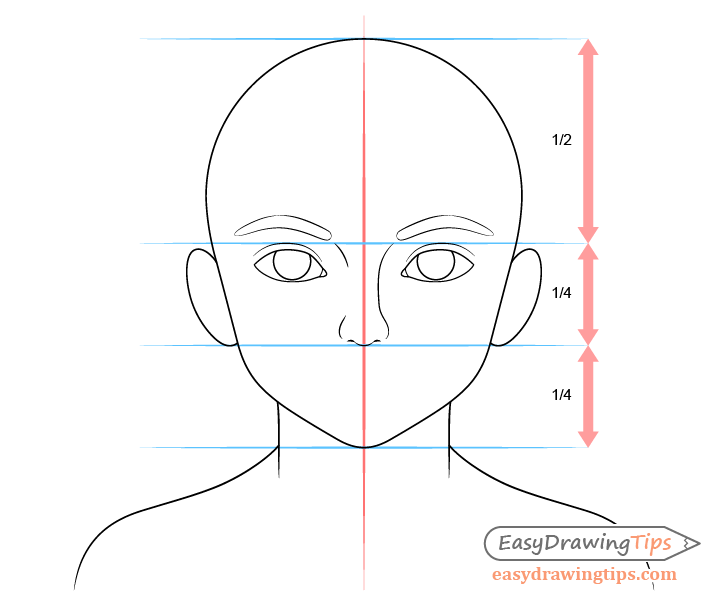
Draw the nose with it’s bottom at the same level as the bottom of the ears (a quarter way up from the bottom of the head) and it’s top at the level of the eyelids. It’s upper part should curve towards the eyebrows.
You may notice that in the example only one side of the nose is fully outlined with just a hint of the other. There are a couples of reasons for this. One is that it will make the nose appear less pronounced (as is common for kids). The other is that an outline that is overly defined will make the drawing look too much like a wire frame.
Step 6 – Draw the Mouth/Lips
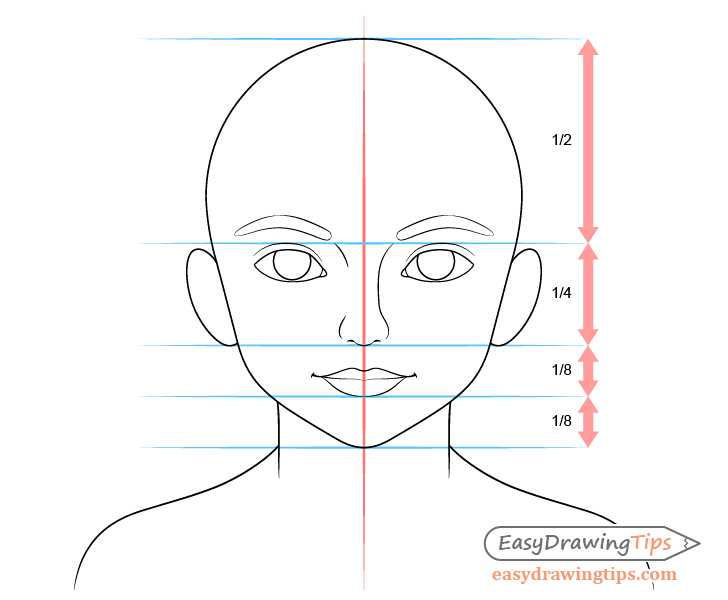
Place the mouth with the bottom of the lower lip halfway between the bottom of the nose and the bottom of the chin. In this case the girl will have a very light smile so the corners of the mouth will be very slightly raised.
When drawing the lips keep in mind that the top lip is shaped somewhat like a flattened letter “M” and is narrower than the bottom lip. The bottom lip can be defined by a pair of curves that start the middle and then begin to curve in the opposite direction near the edges of the mouth.
Once done with this step you can erase the center line and any other guide lines you chose to draw.
Step 7 – Outline the Hair
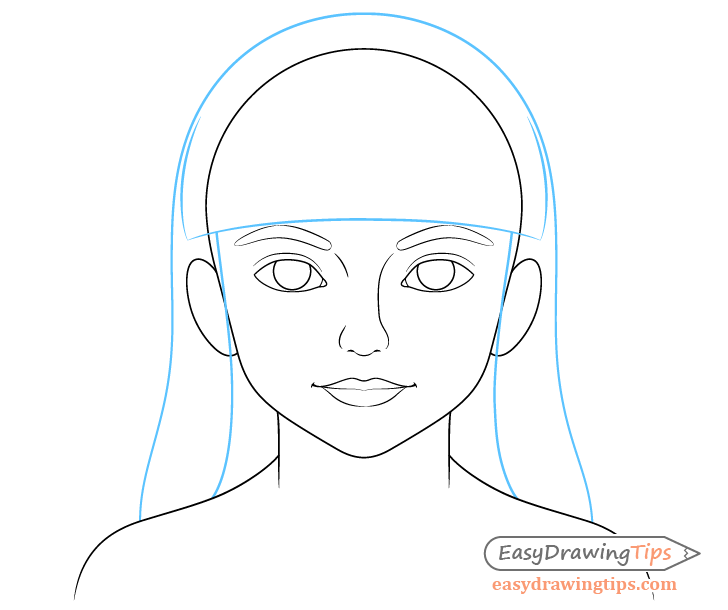
Add the outline of the overall shape of the hair over to top of the outline of the head (as though it’s see through). The reason you want to draw this way is because helps avoid mistakes. When you can see the shape of the head you know exactly how much volume you are giving the hair.
Again, remember to keep these lines fairly light.
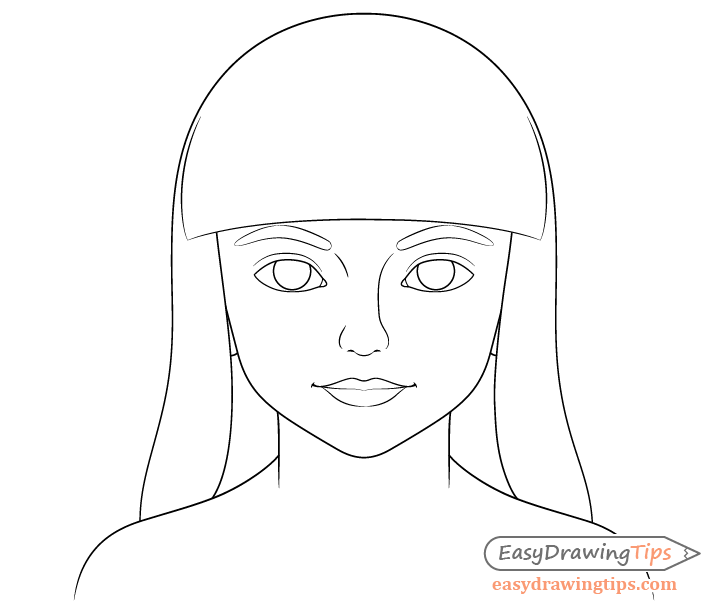
Once you have the shape of the hair outlined you can erase the parts of the head that are covered by it.
Step 8 – Draw the Hair Splits
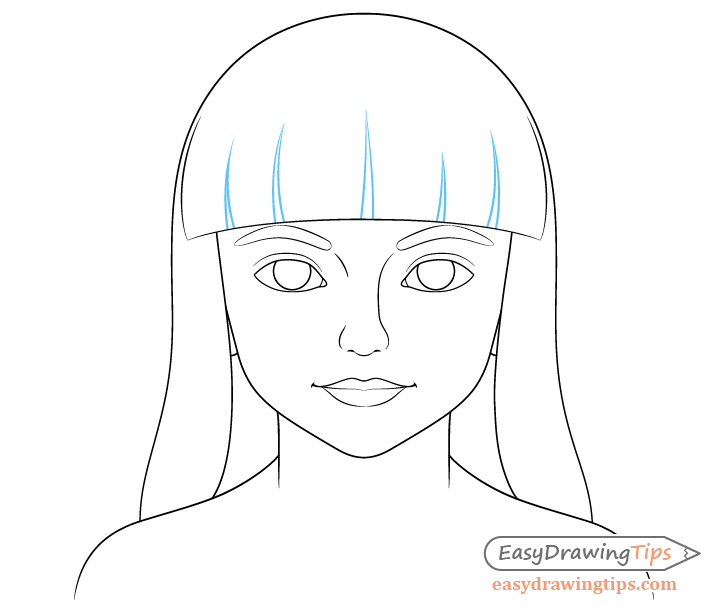
To break up the hair’s solid looking outline add some splits into the part along the forehead. Try and make these of varying size and give them somewhat random placement to make things look more natural.
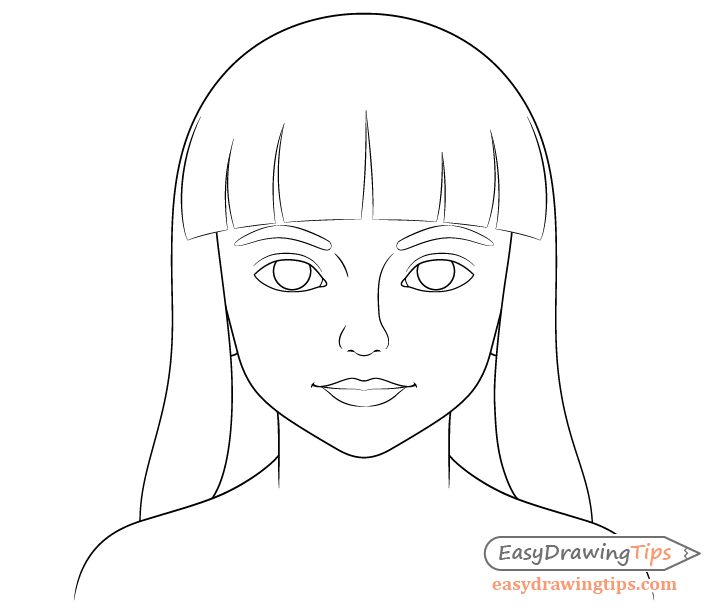
Erase the parts of the hair’s outline in between the splits so that your drawing looks similar to the above example.
Step 9 – Draw the Collar Bones & Clothes
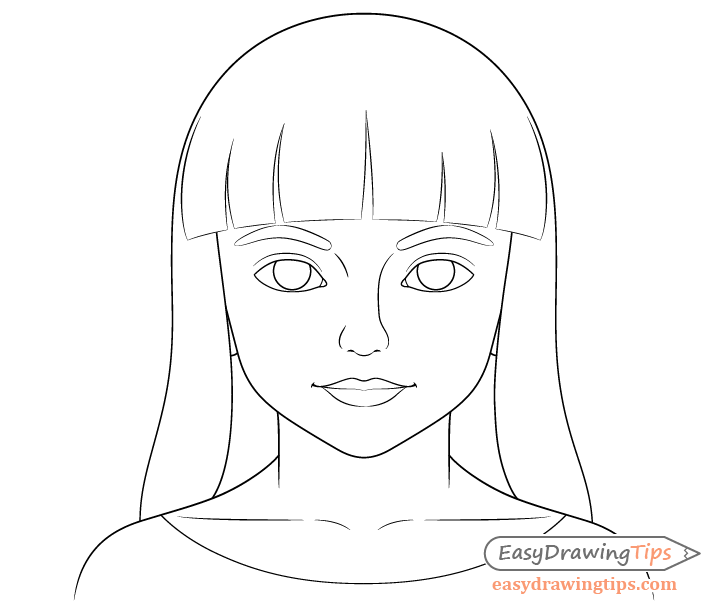
Add a hint of the collar bones and a bit of clothing (just then neckline) to the body. Position the collar bones so that their outer ends point towards the upper parts of the shoulders and give them slight downwards curves on their inner ends.
Step 10 – Draw the Details of the Eyes
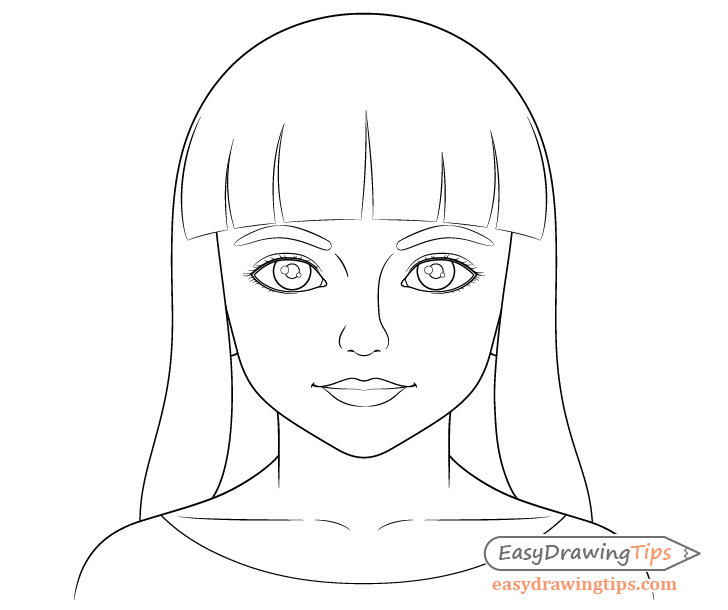
For this step draw the smaller details of the eyes. You can see a step by step a breakdown of doing this in the example below.
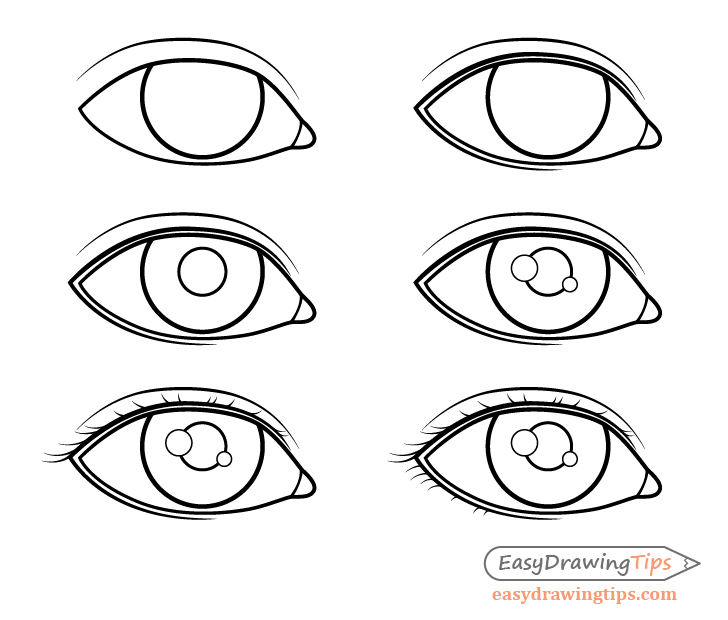
Only one eye is shown in the example but you can draw the second eye in pretty much the same way. You should however try to have a slightly different placement of eyelashes as they are generally not perfectly symmetrical.
- Have the basic eye drawing (should have already been done in step 4 of the tutorial)
- Draw the edges of the eyelids
- Draw the pupils
- Outline the highlights (reflections)
- Add the upper eyelashes
- Add the lower eyelashes
Try and keep the outlines of the highlights as light as possible (just barely visible) as you want them to blend into the shading later on.
Step 11 – Draw the Hair Fold
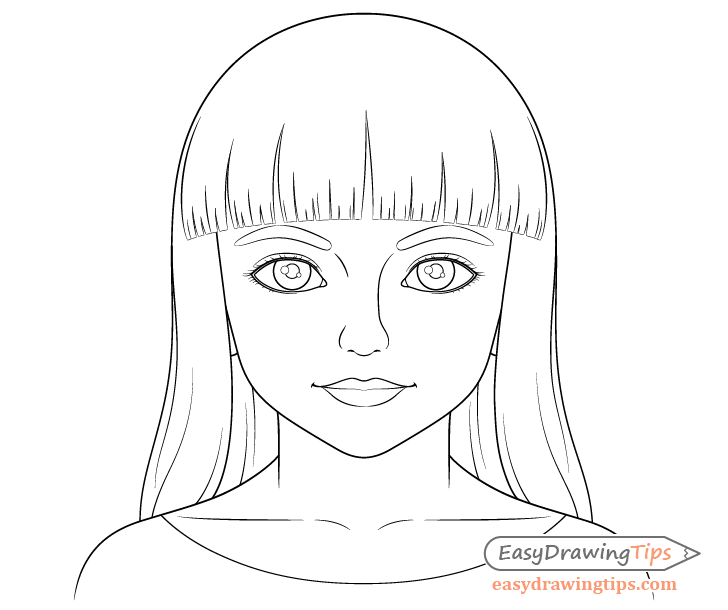
Add the smaller splits and folds of the hair to finish the line drawing (as shown in the example). You will want to place the smaller splits along the forehead in between the larger ones. The folds will generally be lower down as the hair bends when it rests of the shoulders.
Once done with this last set of details you can darken your lines by tracing over them (if you feel that they are too light).
Step 12 – Shade & Finish the Drawing
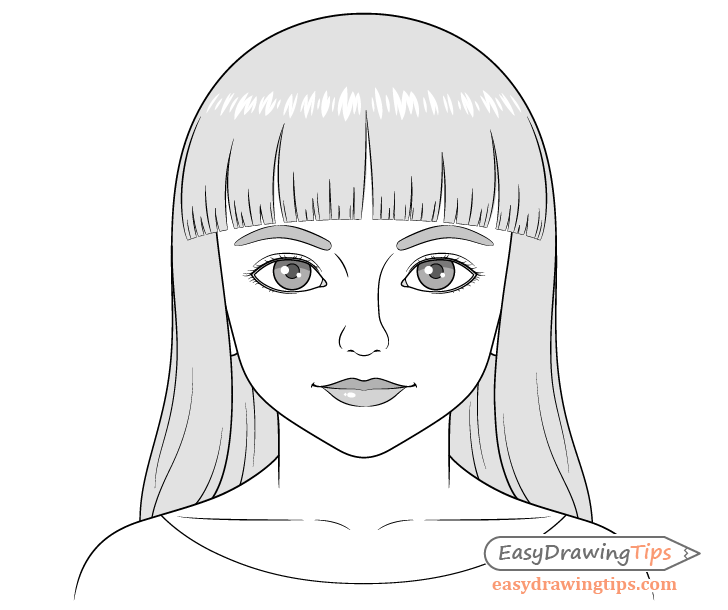
To keep the tutorial beginner friendly the shading will be done in a very simplified manner. However, even basic shading such as this can make a drawing stand out significantly more then if it was just lines.
This particular example will have a fairly generic lighting setup. The shadows will be placed as though the girl is either outside during daytime or in a well lit room. This means that the light will generally be coming from above and that the shadow will tend to be on the bottom and/or more closed off areas of the face.
Begin by first filling each area with solid shading. You can make the hair and lower lip and tear duct area of the eyes fairly light. When shading the hair leave a light strip for the highlight. You can either outlined this beforehand or simply create the highlight by shading around it. Also leave a pair of highlights on the the lower lip. This will give the lips a more moist/shiny appearance. You can again outline these beforehand or simply create them as you shade.
Make the eyebrows, irises and the upper lip slightly darker than the hair. Be sure to leave the highlights inside the eyes white. Shade the upper part of the irises even darker and make the pupils the darkest.
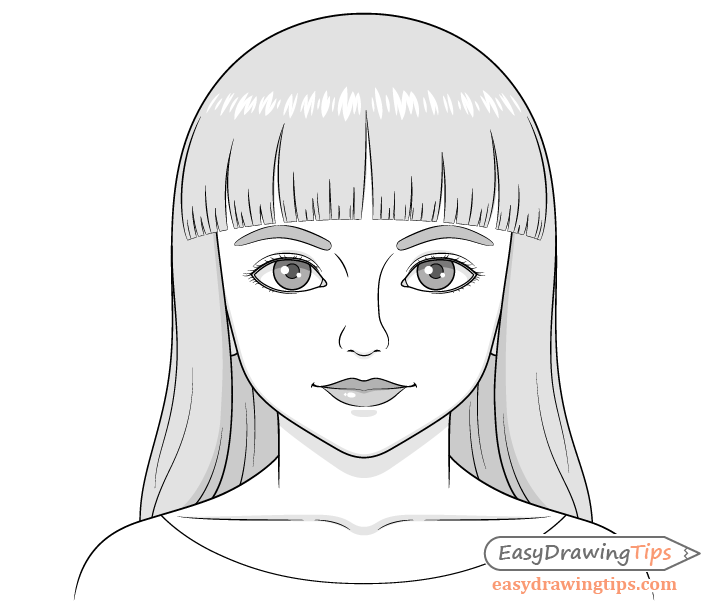
Once you have the major areas of the face shaded you can add some of the smaller shadows. These will be located as follows:
- Along parts of the eyelids
- At the upper parts of the white of each eye
- Below the nose
- Along the upper part of the bottom lip
- Below the lower lip
- Along the bottom of the face
- Below the head
- Along the collar bones
- The visible parts of the ears
- The background and inner side areas of the hair (around the neck and near the sides of the face).
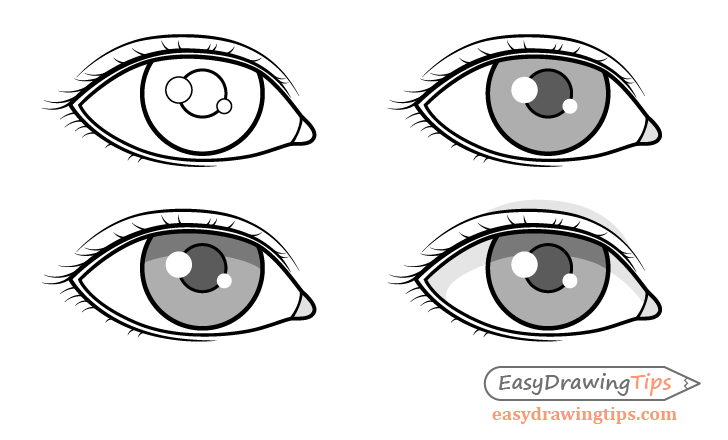
Above you can see a step by step example of shading the eyes.
When done adding the shadow you should have a finished drawing of a young girl’s face.
Conclusion
Drawing people can be difficult. In order to help this tutorial provides a detailed step by step breakdown of the process with proportions and easy to follow instructions. Weather you are a beginner looking to get better at drawing people or simply would like to try it for fun this can be a very helpful and informative guide.
For more tutorials like this one also check the following:
- How to Draw a Female Face Step by Step Tutorial
- How to Draw a Male Face Step by Step Tutorial
- How to Draw the Female Body Step by Step

