How to Draw a Strawberry Step by Step
This tutorial shows a simple way to draw and color a strawberry. It consists of a total of six steps with illustrated examples and detailed instructions.
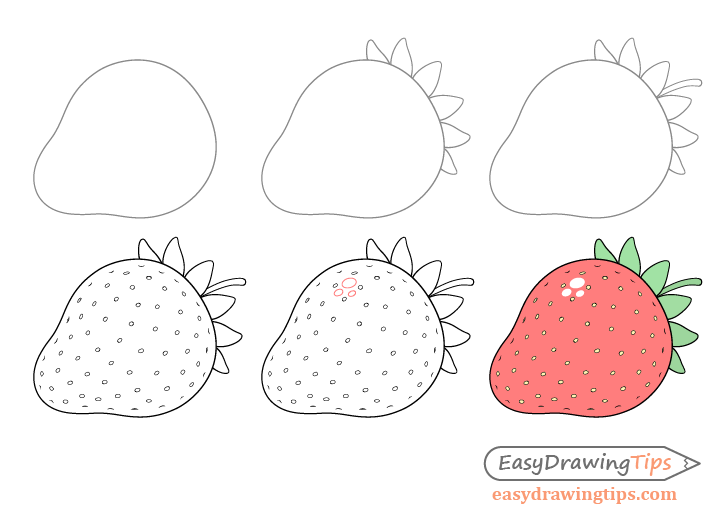
The tutorial is fairly easy and provides some tips that can be very useful for beginners. The goal is to draw a strawberry with a realistic shape and to then give it some basic color.
It’s recommended that you start the tutorial in pencil and use light lines that are easy to erase in case you need to make a correction. You can darken them before the final step once you feel that everything is in the right place.
Step 1 – Outline the Shape of the Strawberry
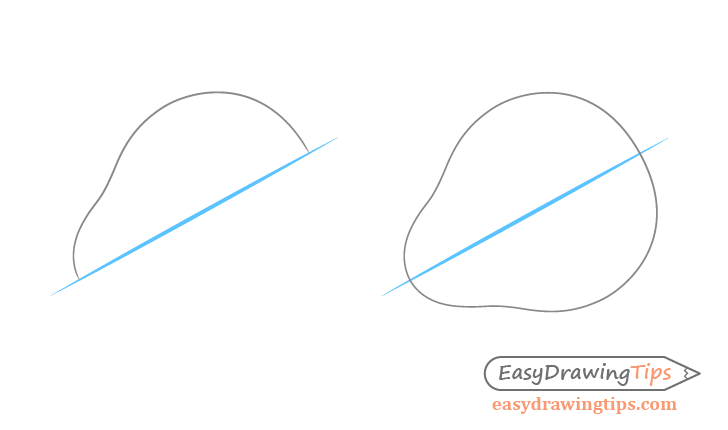
In this case the strawberry will be drawn in 3/4 view facing slightly towards the viewer with it’s bottom tip.
Although strawberry shapes are not always perfect, in this particular example we will be drawing one that is fairly symmetrical. To help you insure that both halves of the strawberry are relatively equal in width (don’t need to be perfectly so) draw a straight angled line that will run through where you wish to have the middle of the berry. To each side of this line draw each of it’s halves.
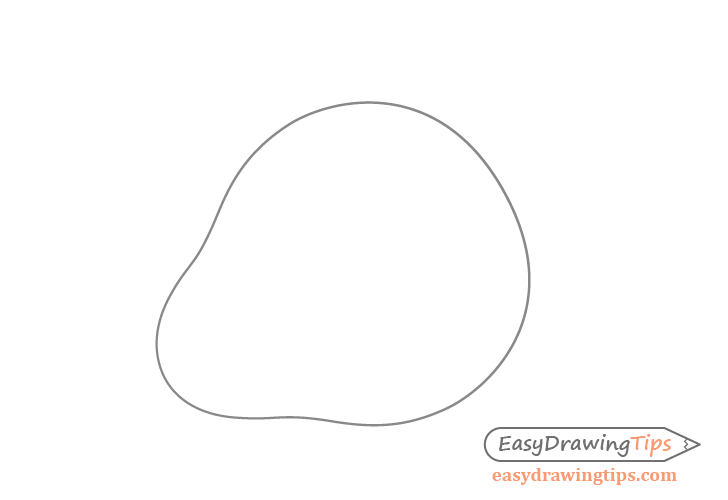
You can erase the center line once done so that you have a clean outline like the example above.
Step 2 – Add the Leaves
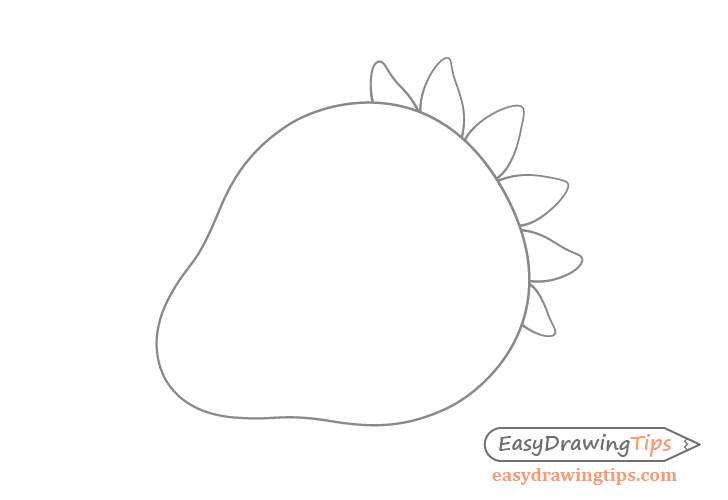
As the back of the strawberry is facing away from the viewer the crown will be partially hidden with just some of it’s small leaves showing.
Draw these leaves fanning out from behind the berry as in the example. Try and make their shapes slightly different from one another so that the drawing looks more natural.
Step 3 – Add the Stem
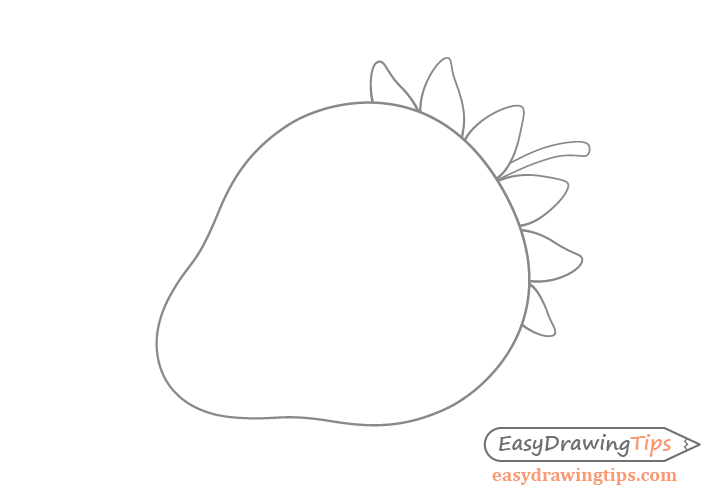
For this really simple step add a little bit of the stem coming out from behind the leaves. Make it fairly thin with a light curve to it’s shape.
Step 4 – Add the Seeds & Finish the Line Drawing
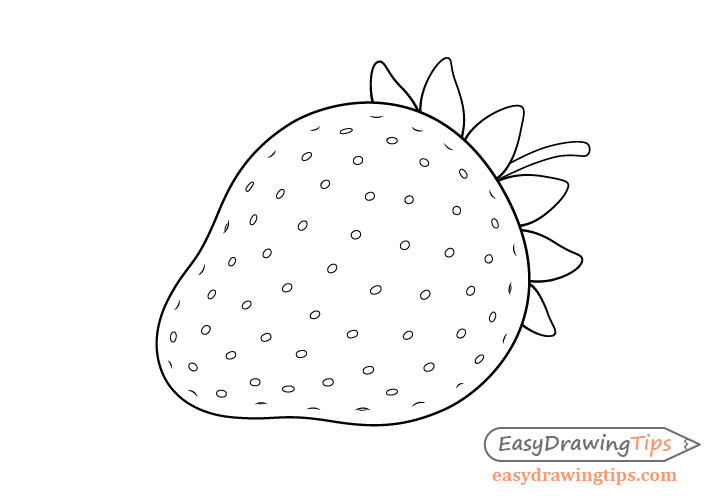
For the last set of details add the seeds. Draw the ones around the edges flatter and closer together and the ones near the middle wider and farther apart. The reason for this is that the seeds around the edges will be viewed on an angle. The curvature of the strawberry will also make it seem like they are close together. Try and position the seeds in a way where they “flow” along the shape of the berry, especially around the edges.
By drawing in the above way you can help make the strawberry appear more three dimensional. If you were to draw the seeds of the same size and evenly spaced it would look like it’s flat. This is a fairly common mistake that beginners often make.
For tips on more good drawing practices you can also see:
Beginner Guide to Learning to Draw
To finish this stage of the drawing you can darken your lines by tracing over. If you feel confident in your tracing ability you can even do it with a thin black marker. Otherwise just do it with the pencil.
Step 5 – Outline the Reflection
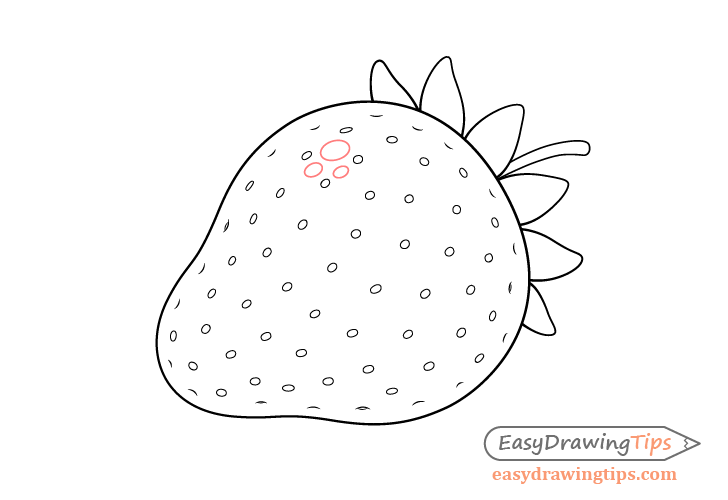
Before adding color outline a couple of small reflections on the upper part of the berry. Do it with a regular pencil or in red. These will help show that the strawberry has a fairly shiny surface. By adding the reflections in a cluster you can show that the surface is uneven as the light reflecting from it is broken up.
Step 6 – Color the Strawberry
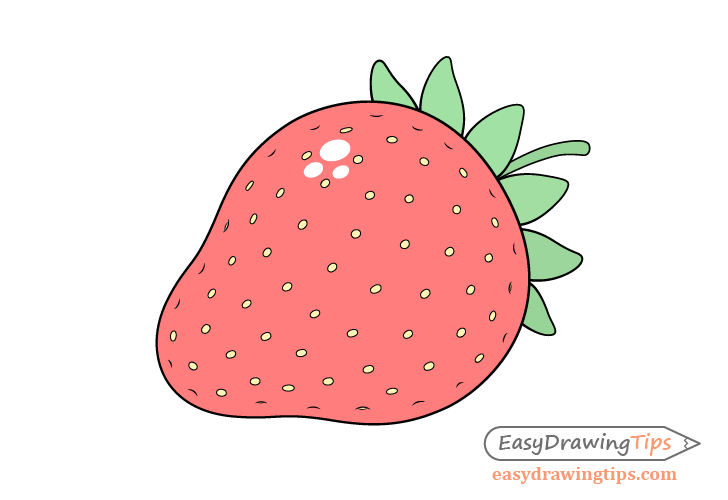
You can use whatever medium you like to color the drawing. Simply make the berry red, the leaves/stem green and leave the reflections white.
Conclusion
This tutorial provides some tips that can significantly improve your artwork without too much effort. By adding the seeds and reflections in the ways that were described you can make the berry appear more three dimensional and give a hint of it’s surface texture without complex shading.
If you like these types of easy and effective drawing guides you should also check the following:
- How to Draw a Pizza Slice in 6 Steps
- How to Draw a Milk Carton Step by Step
- How to Draw a Carrot Step by Step
- How to Draw a Shopping Bag Step by Step
- How to Draw a Peach Step by Step Tutorial
- How to Draw a Mushroom Step by Step

