How to Draw a Sunflower Step by Step
This tutorial shows an easy way to draw a sunflower. It includes a total of nine steps with illustrated examples and quick drawing tips.
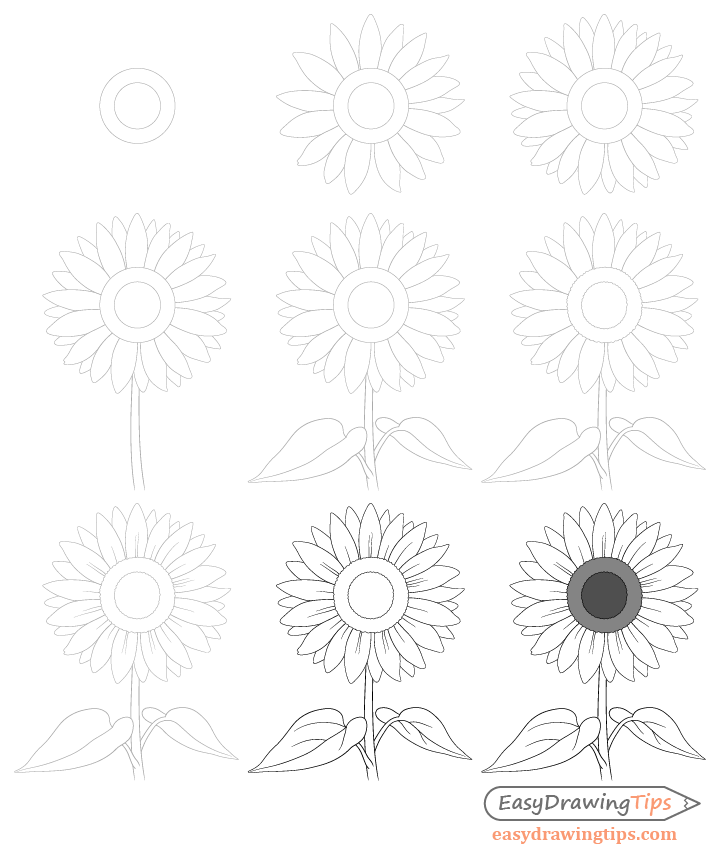
You can see a preview of the drawing steps in the example above.
The focus of this tutorial is on creating a simple but at the same time serious looking drawing that can make for a nice portfolio item.
Drawing something like this can be particularly good for beginners as it does not require complex shading and can be fairly forgiving of mistakes. However it’s still good practice to start in pencil an make light lines that you can easily erase. You can darken your lines later on by tracing over them.
Step 1 – Draw the Center of the Sunflower

Begin by outlining the center part of the sunflower by drawing a circle. Be sure to position it in a way where you still have some room for the petals above and plenty of room for the stem and leaves below. Next draw a second smaller circle inside the first one.
These circles do not need to be perfect in shape but try and not have them too warped either.
Step 2 – Draw the Foreground Petals

Around the center part of the sunflower start adding the petals. You can make the shapes of these somewhat random but generally they should be narrower near the base, wider towards the middle and then again get narrower towards the tips. You can also draw some of them overlapping one another and a few some distance apart.
The easy thing about drawing this first set of petals is that you don’t have to worry if the combined shape of these looks somewhat uneven. You can tweak things in the next step.
Step 3 – Draw the Background Petals

Sticking out from behind the first set of petals you can draw in a second set. Use these to fill any gaps and to balance out the overall shape of the sunflower.
Step 4 – Draw the Stem
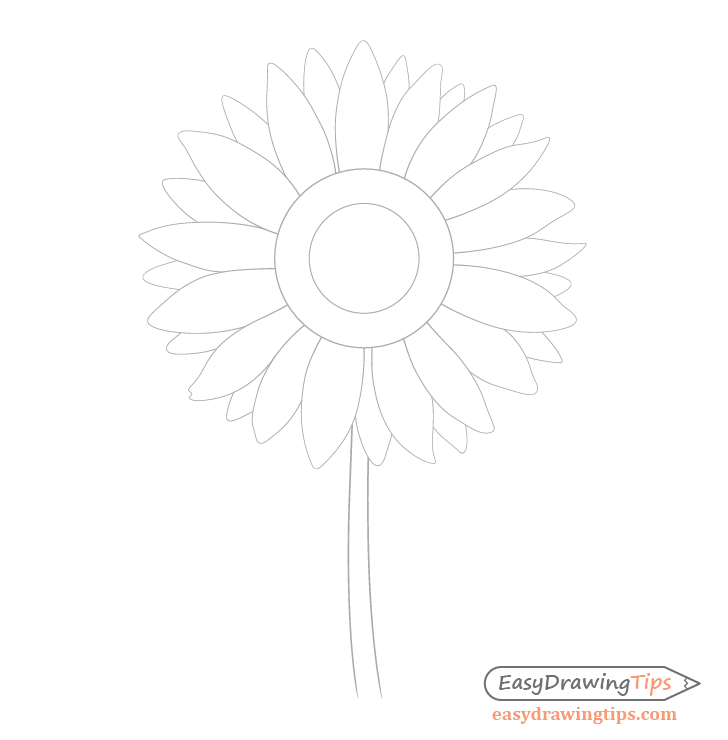
For this quick step draw the stem with a light curve and make it slightly thicker towards the bottom and thinner towards the top.
Step 5 – Draw the Leaves
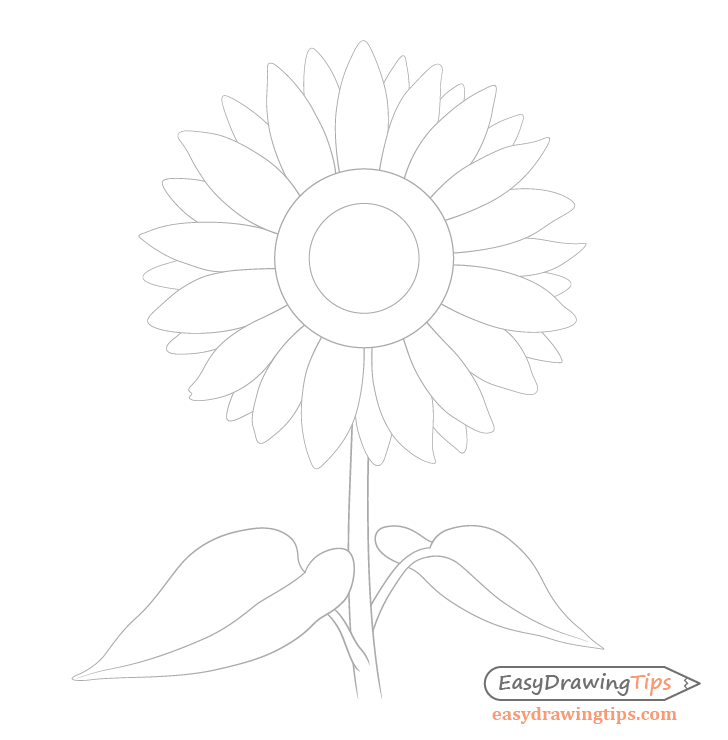
Sunflower leaves are shaped somewhat like a heart. In this case they will also be viewed on an angle. To show this draw them thinner then you would if you were looking directly at the top or bottom of the leaf.
The leaf in the front will be facing slightly towards the viewer. The leaf in the back will be facing away and it’s base will be partially hidden behind the stem.
Step 6 – Outline the Organic Shape of the Center
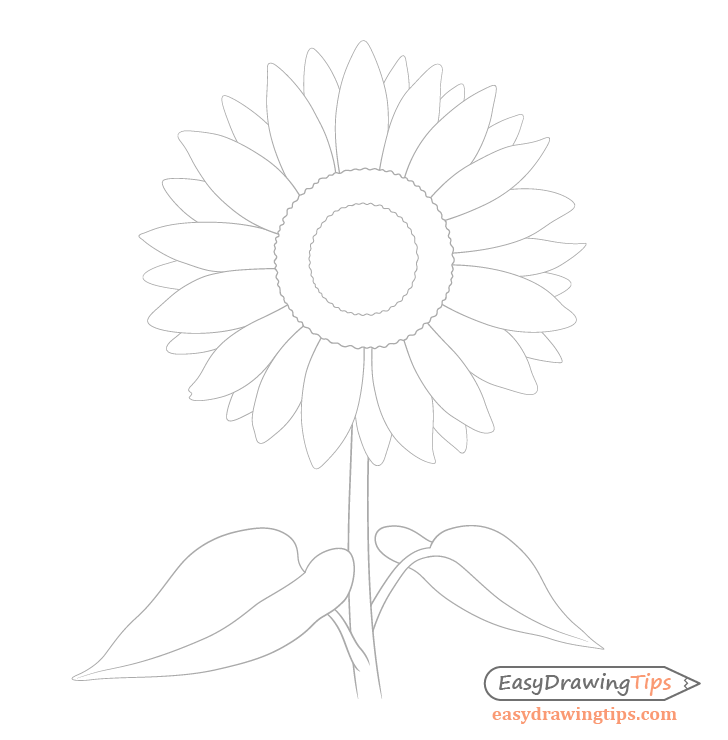
Now give the center of the sunflower a more uneven shape by going over the two circles drawn earlier with a “bumpy” line.
This will give the sunflower a more natural/organic look.
Step 7 – Draw the Petals Folds
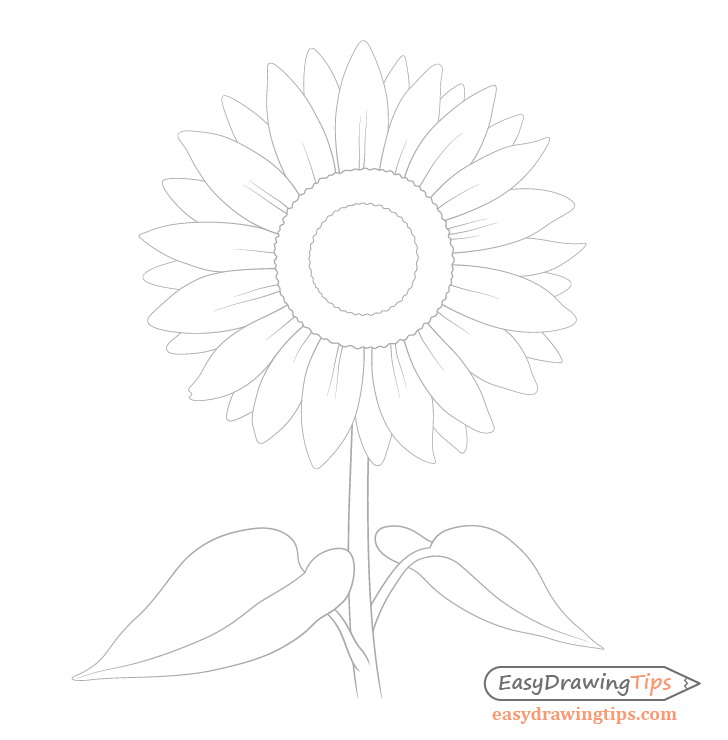
Add some folds to the petals by drawing a few wavy lines at their base. The number of folds for each petal can be somewhat random but generally one to three lines should be enough.
Step 8 – Add the Leaf Veins & Finish the Line Drawing
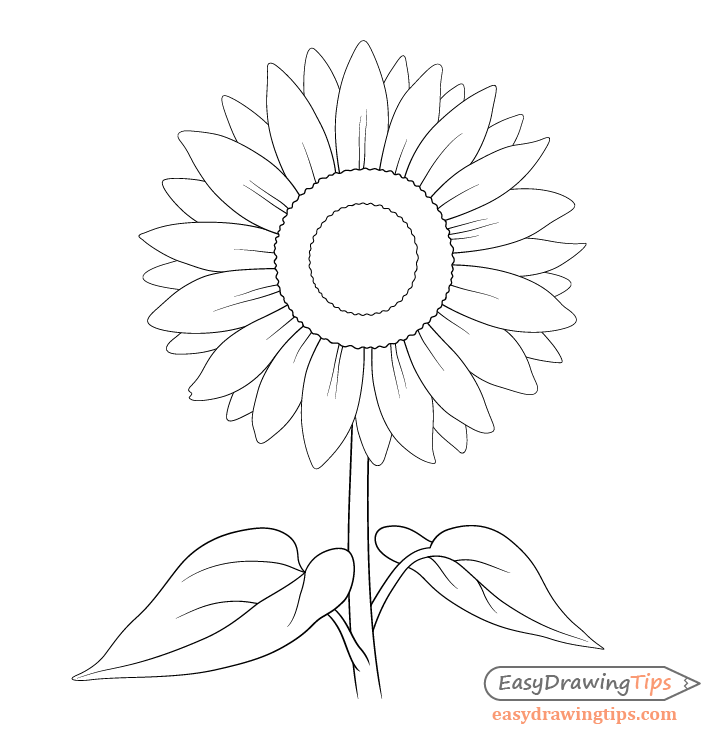
Running along the leafs draw a few veins. You do not need to draw a lot of these but instead just enough to give a hint of them being there.
Once done adding the veins you can trace over your entire drawing with darker pencil lines.
Step 9 – Add Some Shading & Finish the Sunflower Drawing
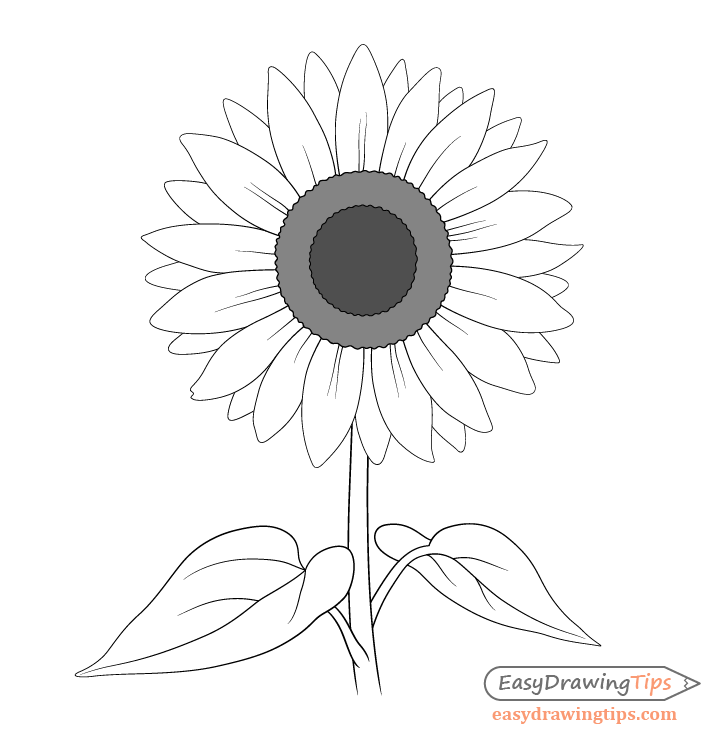
To make the sunflower stand out a little more than a plain line drawing you can give it just a bit of shading.
Fill in it’s center (where the seeds are) with dark grey and the rim around that with a lighter grey.
Conclusion
The sunflower in this example is not photo realistic but at the same time it still looks like a serious drawing and is not overly stylized or cartoony. If done well a drawing like this can make for a nice portfolio item for a beginner/intermediate artist.
For more tutorials that focus on line drawing and/or minimal shading see:
- How to Draw a Strawberry Step by Step
- How to Draw a Smile Step by Step
- How to Draw Eye Expressions Step by Step
- How to Draw a Wolf Face & Head Step by Step
- How to Draw a Shoe in Nine Steps

