How to Draw an Eggplant Step by Step
This tutorial explains how to draw a realistic eggplant (with shading) in several steps and provides detailed pencil drawing examples for each step.
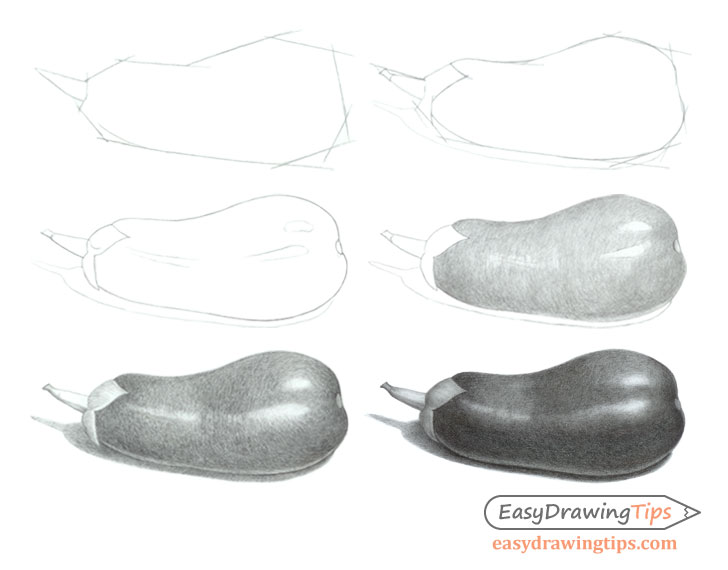
An eggplant has a fairly simple shape that is easy to draw but due to it’s dark color and reflective surface shading one can be little bit of a challenge.
This tutorial gives some tips to help you draw a realistic eggplant as well as general tips on shading similar objects and surfaces.
Step 1 – Define the Basic Shape of the Eggplant
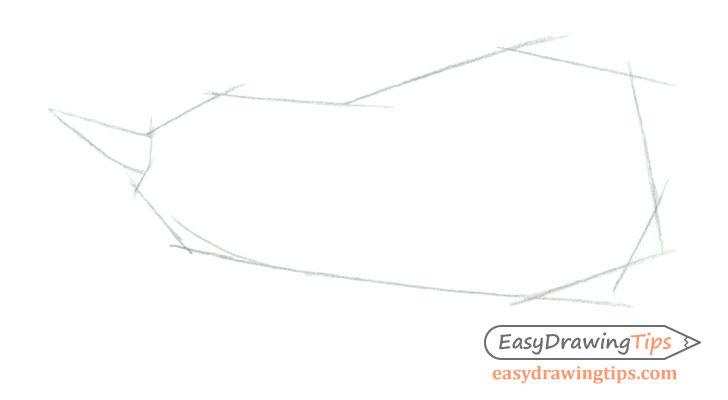
Start the drawing by making a set of construction lines to sort of “frame” the eggplant and estimate it’s width, height, and overall shape.
Step 2 – Make a Basic Line Drawing
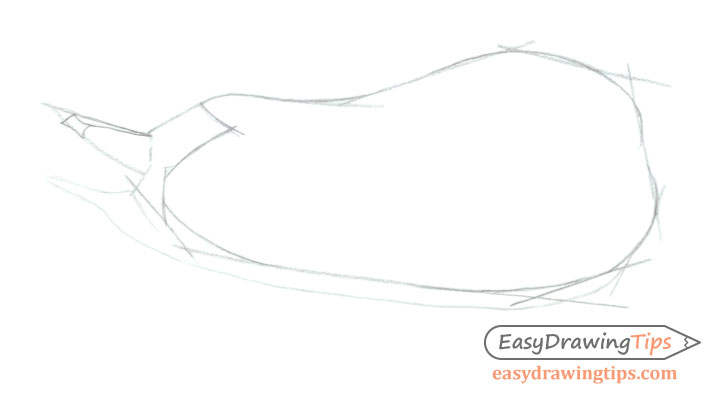
Inside the construction lines draw the curved shapes of the eggplant.
Step 3 – Make a Clean Detailed Line Drawing
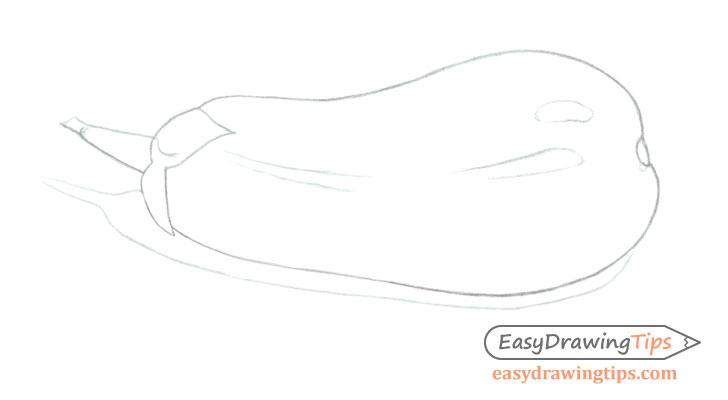
Clean up the line drawing by erasing/removing the construction lines and outline some of the smaller details such as the shadow and highlight areas (bright reflections of the light).
The shadow will be opposite of the light source which in this case is positioned to the upper front area (slightly to the right) of the eggplant. This means that the shadow will fall behind and very slightly to the left of the eggplant.
Step 4 – Analyze the Lighting
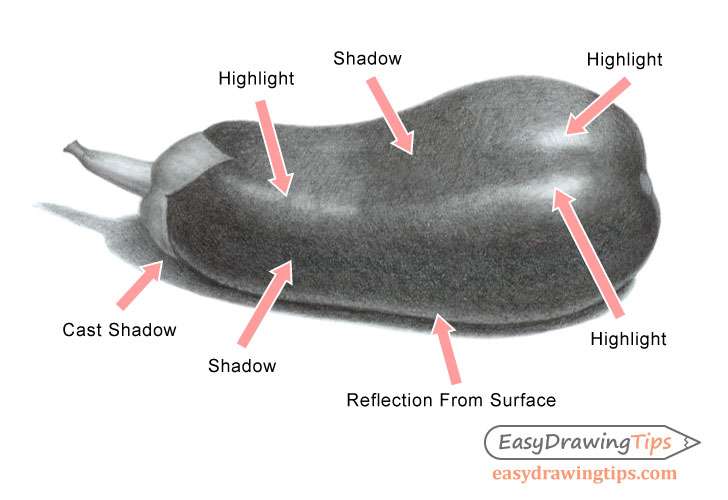
Before you start shading first analyze the lighting conditions and determine the lightest and darkest areas.
In this case (as already mentioned) the light is coming from the upper right front area. This means the largest darker areas will be on the bottom and right side of the eggplant. There will also be a smaller darker area on the very front.
The eggplant is very wide in the front narrower towards the middle and slightly wider again towards the back. This will create a darker area in the middle of the eggplant as well.
Additionally the curves in the eggplant will create two main sets of highlights one on the front portion and one on the back. The front highlights will be split in two due to a slight bend the shape of this particular eggplant in that area.
The eggplant will also have some reflections of the surface it’s sitting on (in this case the surface is lighter than the eggplant) which will create a lighter area on it’s otherwise darker bottom portion.
Keep the above in mind and start shading.
Step 5 – Begin Shading
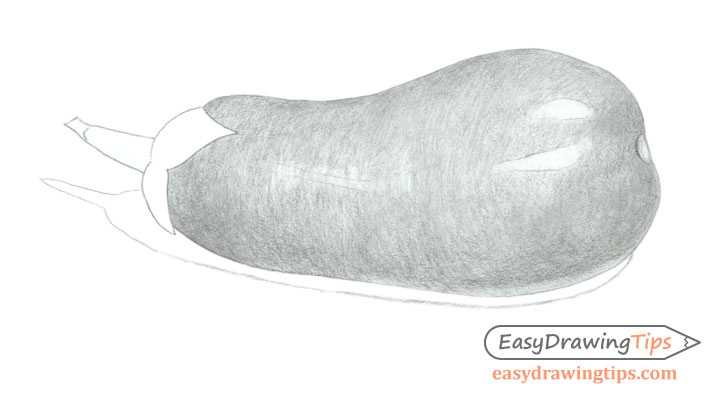
Begin shading the drawing of the eggplant by making strokes that sort of curve along it’s shape (leave the highlights white).
For more on different stroke types see:
Shading Techniques and Stroke Types Drawing Tutorial
See the tutorial below for shading basic 3d shapes:
How to Shade Basic 3D Shapes Tutorial
Step 6 – Intensify the Shading
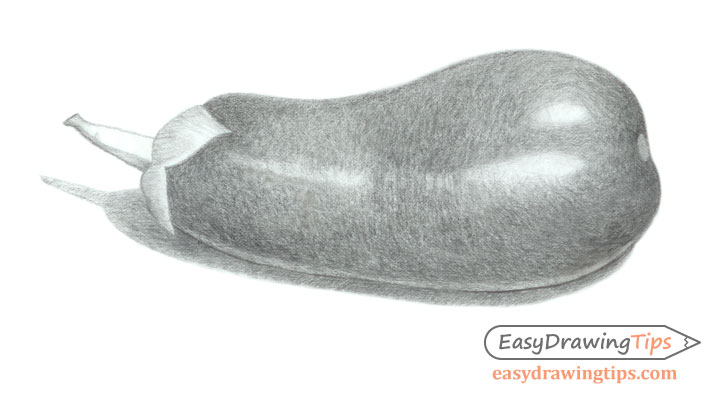
Start adding more shading to the drawing by making overlapping strokes to darken the entire drawing and the “in shadow areas” in particular.
One reason for making gradual strokes like this instead of pressing on the pencil with full strength is so that you don’t make your entire drawing so dark that there is no way left to darken the shaded areas.
This is especially important for drawing objects like the eggplant where the entire surface is already quite dark. You really have to be careful to balance the mid tones (neutral between light and dark areas) and “in shadow” areas.
Step 7 – Finish the Eggplant Drawing/Shading
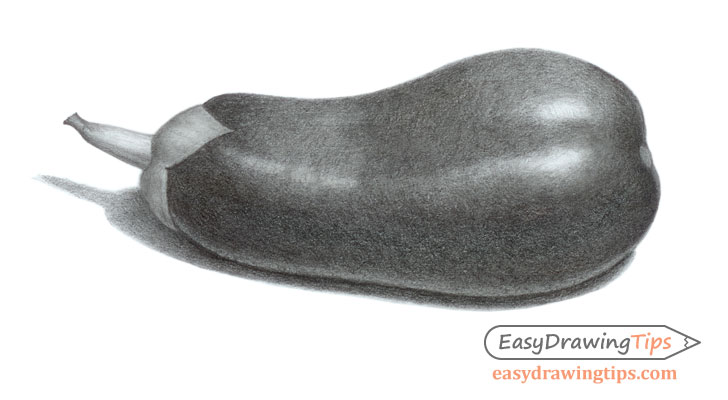
Keep adding more layers of strokes until you pretty much blend the shading create the smooth surface of the eggplant.
In this case the surface the eggplant is sitting on is lighter then the eggplant which creates a lighter reflection area in the eggplant.
Conclusion
Properly shading an objects even with something as simple as pencil can make for a very realistic looking drawing.
For more similar tutorials see:
- Egg Step by Step Basic Shading Tutorial
- How to Draw a Pepper Step by Step Tutorial
- How to Draw a Tomato Step by Step
- How to Draw Cherries Step by Step
- How to Draw a Realistic Watermelon Step by Step

