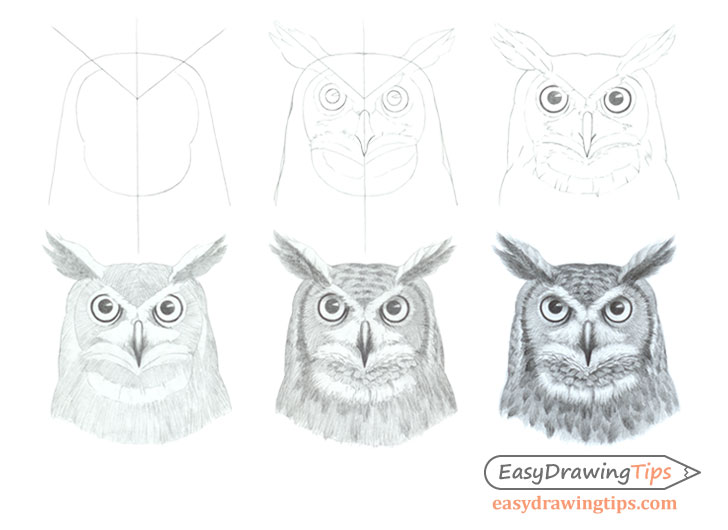
How to Draw an Owl’s Face & Head Step by Step
This tutorial explains how to draw an owl’s face and head step by step from the front view and provides pencil drawing examples for each step.
Please note that some of the construction lines in this tutorial have been made darker so that they are easier to see. If you are drawing using pencil and paper you should make very light strokes for the line portion of the drawing.
Step 1 – Draw the Construction Lines for the Owl’s Head
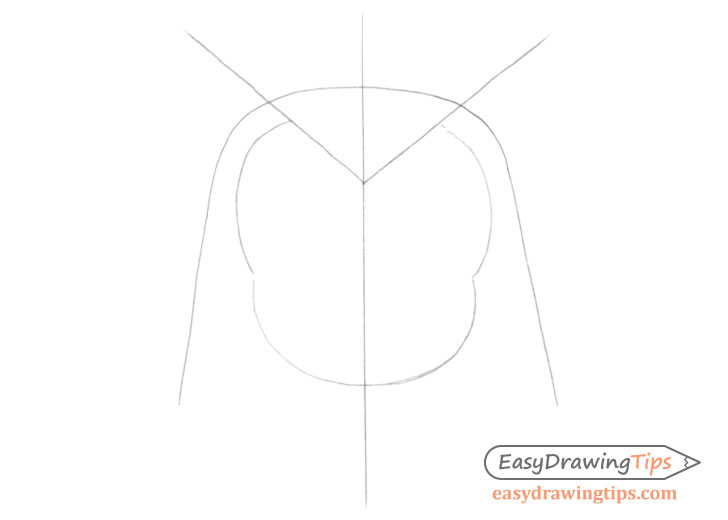
Draw several guide/construction lines to help you establish the basic shape and major proportions of the owl’s head.
The first thing you want to draw is a straight vertical line. This line will help you determine the middle of your drawing area and insure that both halves of the face/head are relatively even in width.
Next draw the outer shape of the head followed by the two angled lines that will establish the “horns” (its a horned owl) and “eyebrow” feathers.
Finally draw the shape of the face which in this case is basically a set of three curves.
Step 2 – Draw the Basic Shapes of the Head
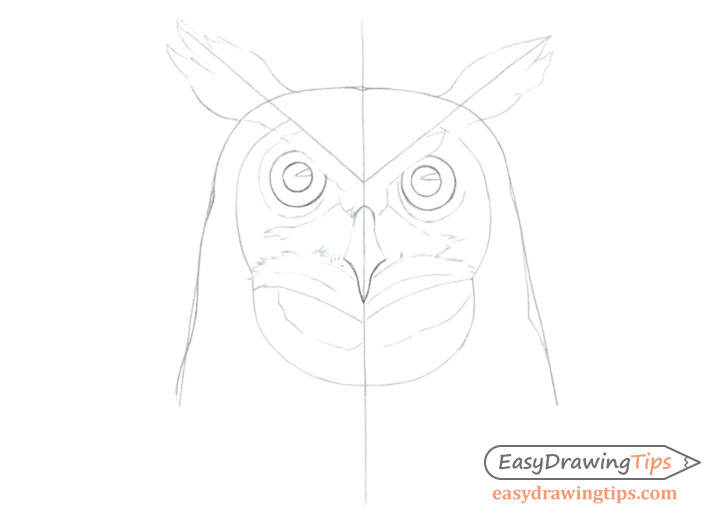
Based on the guides from the previous step draw the various features of the owl’s head and face such as the eyes, beak, “horns” and various patterns of it’s face as well as the smaller curves of the outline of it’s head. Keep in mind that the owl’s eyes are basically round but their top portion will be slightly covered by the feathers.
Step 3 – Clean Line Drawing
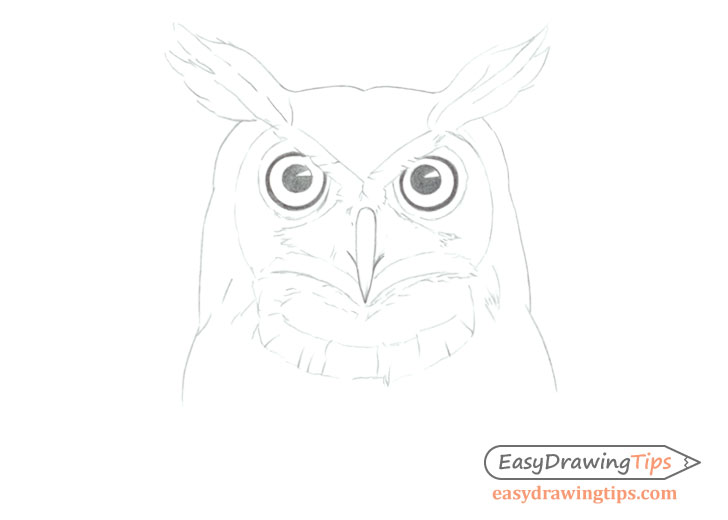
Erase the construction lines, fill in the dark areas of the eyes (leave the highlights white) and add some small hints of the various patters of the feathers.
Step 4 – Begin Shading
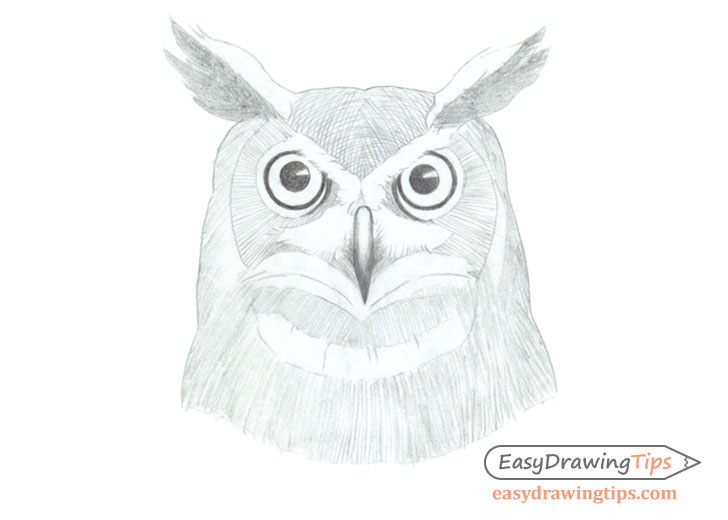
Begin shading by adding strokes that go along the shape of the owl’s head/face. You can use one directional strokes or a light crosshatch where appropriate (in this case the top of the head).
Leave the lighter feather areas such as those above the eyes, around the beak and along the neck white (for this step).
For an explanation of different stroke types see:
Shading Techniques and Stroke Types Drawing Tutorial
Step 5 – Refine the Shading
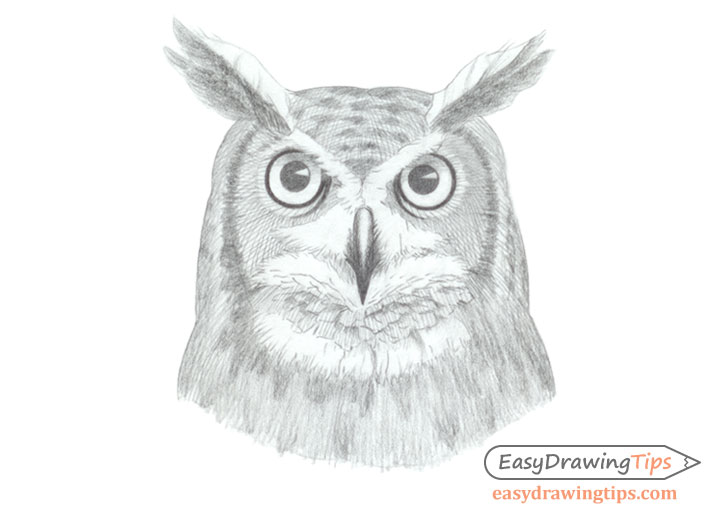
Add some more crosshatch strokes around the eye areas and darken some areas to create the individual feathers along the top of and below the head. Owls of this type also tend to have a sort of dark outline are around the sides of their face so darken that as well.
Draw the darker feathers around the neck area (between the two sets of light feathers) with short strokes darker at the base and lighter toward their outer ends.
Step 6 – Finish the Drawing
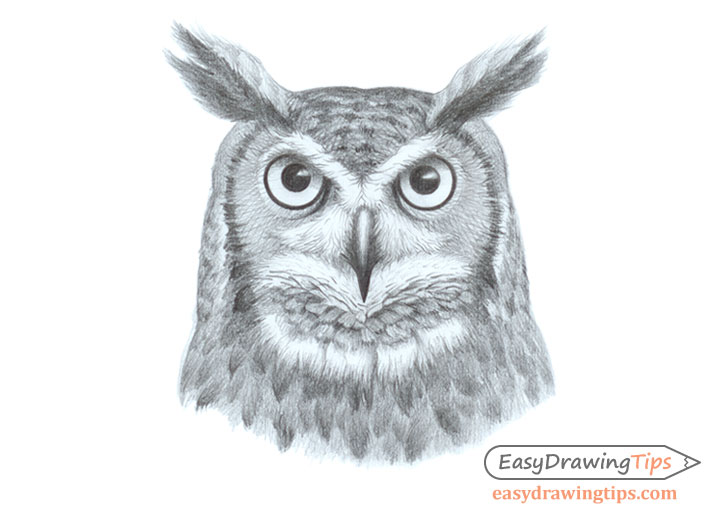
Finish the shading by adding more overlapping strokes to reinforce the darker areas of the owl. Make the feathers more pronounced but don’t completely blend the strokes. Having visible strokes will give a more feather like texture to the owl making it look more realistic.
Finally add some lighter strokes (curving in slightly different directions) to the white feather areas of the owl’s feathers to create a sort of “fluff” of feathers effect.
Once you are done refining the shading you should have a finished drawing of the owl.
Conclusion
This is a fairly challenging tutorial as the owl drawing is very detailed and consists of so many variation of strokes. If you would like an easier basic line drawing tutorial of a bird you can check out:
How to Draw Bird Step by Step – Side View
If you are fine with the difficult and would like another similar tutorial then see:
How to Draw a Realistic Hawk’s Head Step by Step


