How to Draw Different Types of Lips
This tutorial shows how to draw different types of lips with step by step pencil drawing examples and a total of eight variations.
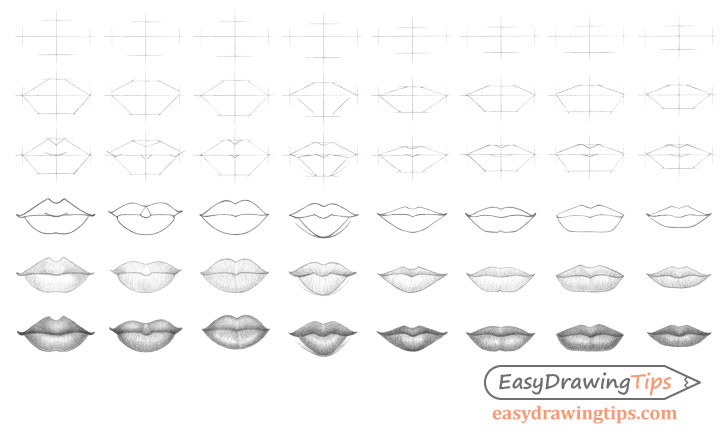
The main focus of this tutorial is on showing how to get the correct shape of a particular set of this. It can be especially helpful when drawing from real life or from photographs as it can help you make sure that the lips you draw actually look like those of the person they belong to.
If you are going to follow along be sure to make light lines for the construction stages of the drawing process as you will want to erase these later on.
Step 1 – Establish the Proportions of the Lips
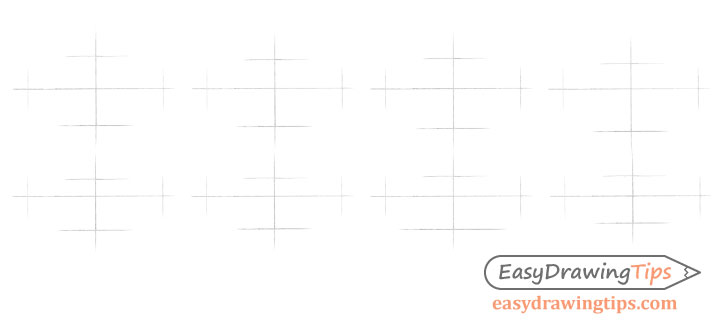
Begin by drawing a pair of intersecting lines, one horizontal and one vertical.
The vertical line can make it easier to see if both sides of the lips are even in width. The horizontal line can help you make sure that the lips are not overly skewed to one side.
Afterwards add several more lines to indicate the height and width of the lips as shown in the examples. Draw a line on the top, bottom and each of the sides.
Step 2 – Add to the Construction Drawing
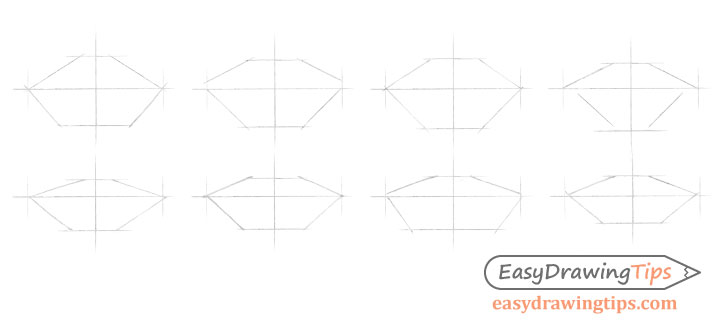
Based on the proportions outlined in the previous step make a construction drawing of the outer shape of the lips. To make this drawing quicker and easier the examples use straight lines but curves may also be appropriate in some cases.
Step 3 – Finish the Construction Drawing
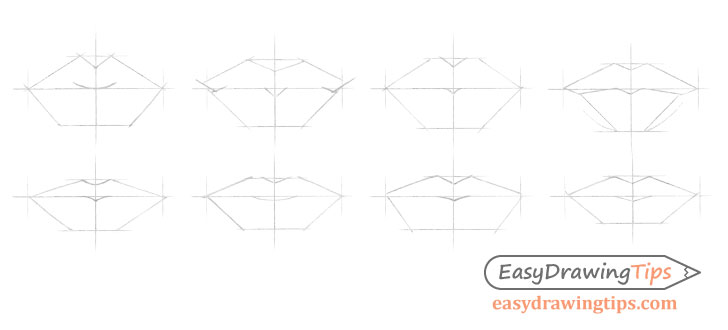
To finish the construction drawing add a few more lines to define the “M” like shape of the upper lip as shown in the examples above.
Step 4 – Make a Line Drawing

Inside the construction drawing outline the organic shape of the lips and erase the construction lines afterwards so that you have a clean outline drawing of the lips.
Step 5 – Begin Shading
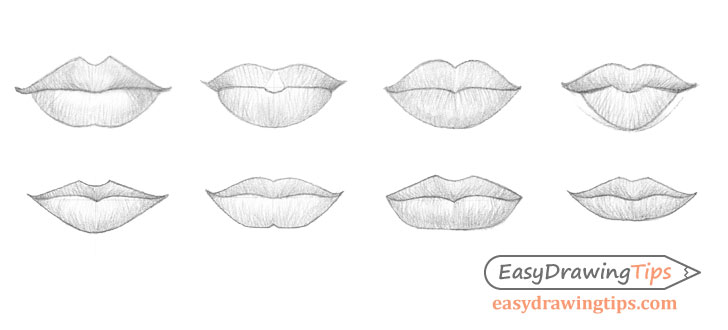
When shading it’s important to understand how the object you are shading is illuminated. In this case the lips will be shaded as though they are in fairly standard lighting conditions such as a well lit room or daytime outside.
It’s also important to take into account that the lips are naturally fairly dark.
Keeping the above in mind begin the actual shading process by making strokes that loosely flow along the shape of the lips.
For explanations of different stroke types see:
Shading Techniques and Stroke Types Drawing Tutorial
Keep the initial set of pencil strokes lighter compared to the shading that you will want to have in the finished drawing. You want to first establish an initial layer of shading that outlines the light and dark areas of the lips.
In the type of lighting described earlier the main highlights (light reflecting from the lips) will be on the bottom lip. The second highlight will be created on the top lip from the light reflecting from the bottom lip.
Step 6 – Finish the Lips Drawing
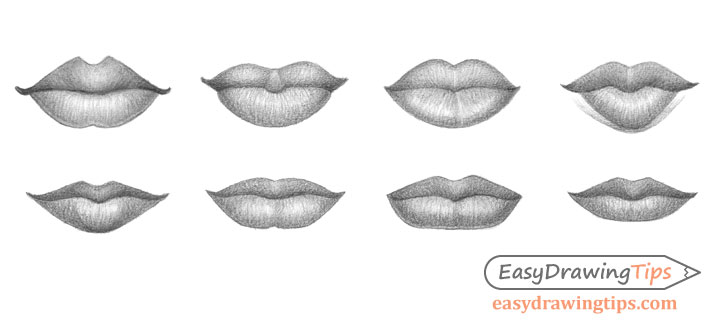
Refine the shading by darkening the shadows and creating smooth transitions between them and the highlights.
The darkest areas for most lip types shown in this tutorial will tend to be along the bottom of each lip. Though in some examples (depending on the shape) the entire upper lip (excluding the highlight) can be fairly dark.
Conclusion
By using the step by step approach suggested in this tutorial you can help insure that you get the correct shape of the lips that actually look like those of the person you are trying to draw. This approach can also help you minimize backtracking in case you make a mistake.
For more similar tutorial see:
- How to Draw a Smile Step by Step
- How to Draw Eye Expressions Step by Step
- How to Draw Lips From 3 Different Views
- How to Draw Different Eye Types Step by Step
- How to Draw Different Nose Types