How to Draw Grapes Step by Step Tutorial
This eight step tutorial explains how to a draw a bunch of grapes with grape leaves. The examples are fairly simple line drawings great for beginners.
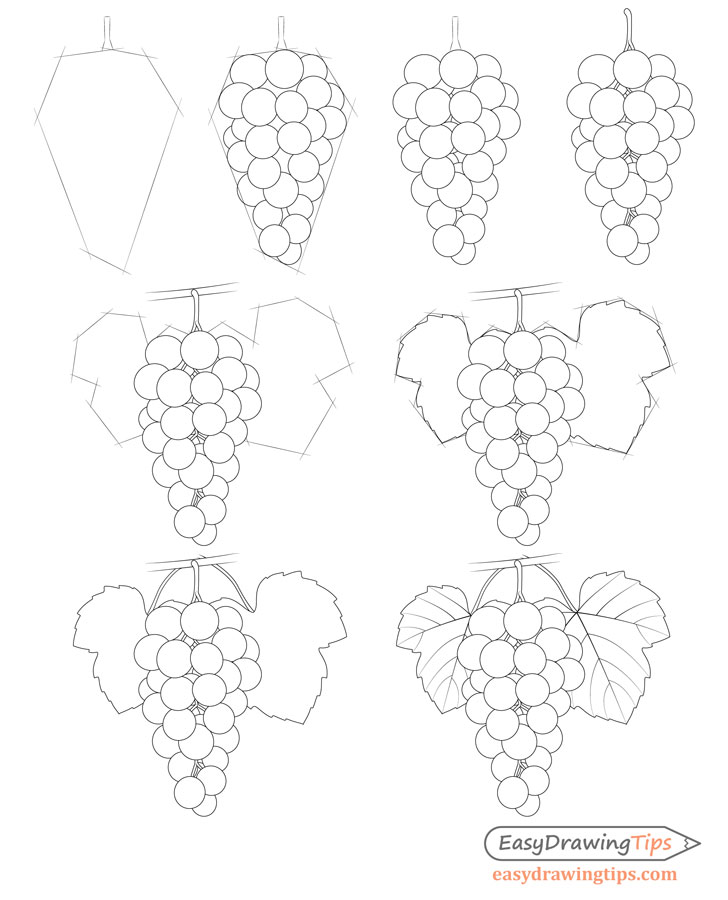
To make the tutorial easier it’s split into two parts. One is drawing the grapes and the other is drawing the leaves.
If you want to do a simple drawing you can leave out the leaves or you can even just try practise drawing one separately.
Be sure to start the tutorial in pencil as you will need to be able to erase construction lines in several of the steps.
Step 1 – Outline the Shape of the Grape Bunch
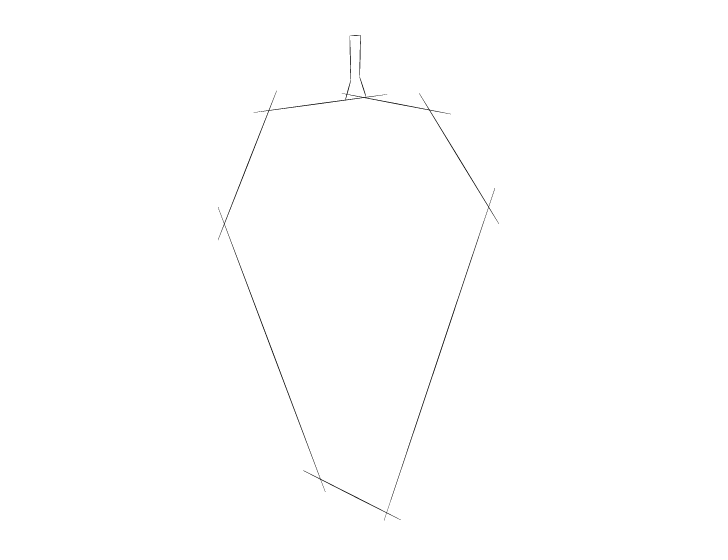
Sketch out the basic shape of the grape bunch by drawing a set of straight guide/construction lines to frame it’s overall form. In this case it will be narrower at the bottom, wider towards the upper middle and then again narrower at the top.
Step 2 – Draw the Grapes
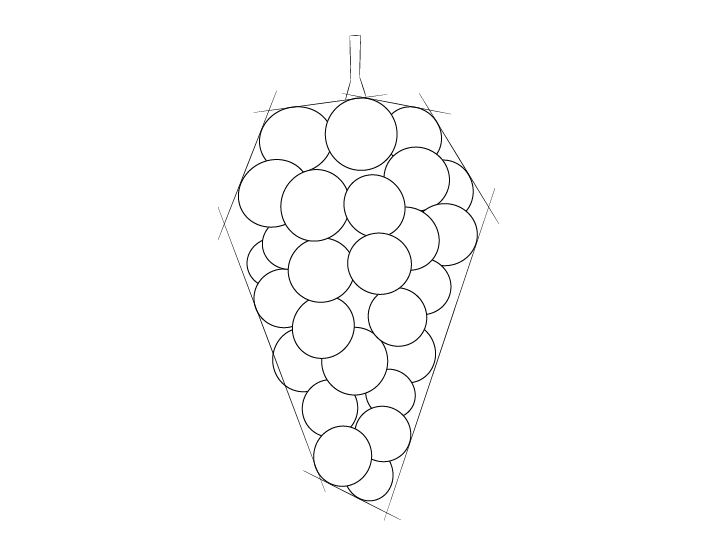
Now fill in the grape bunch “frame” by drawing the outlines of the individual grapes. For this stage draw the grapes that are mostly visible or that help define the shape of the bunch .
The grapes that are fully or mostly visible will generally be at the front. As the grape bunch curves around the grapes on the sides will become more and more hidden (overlapped by those in the front). Be sure to take this into account when drawing.
Make sure to also draw the grapes of slightly varying size and shape. In this example most of the them are drawn very slightly oval in shape and are also positioned at different tilts to make them look more natural.
When drawing the bunch leave a few small open spaces where the grapes are not too dense. These will be used in the next step.
Step 3 – Draw the Background Grapes
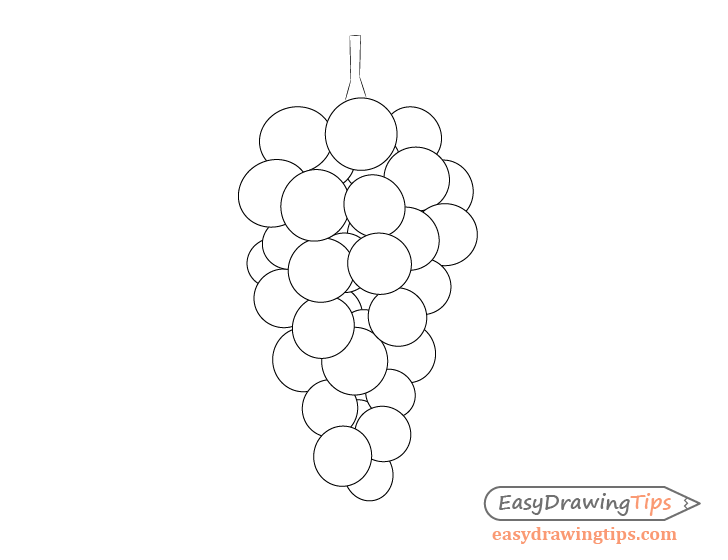
Now draw some hints of the background grapes in the small spaces left in between the foreground grapes in the previous step.
Step 4 – Draw the Stems
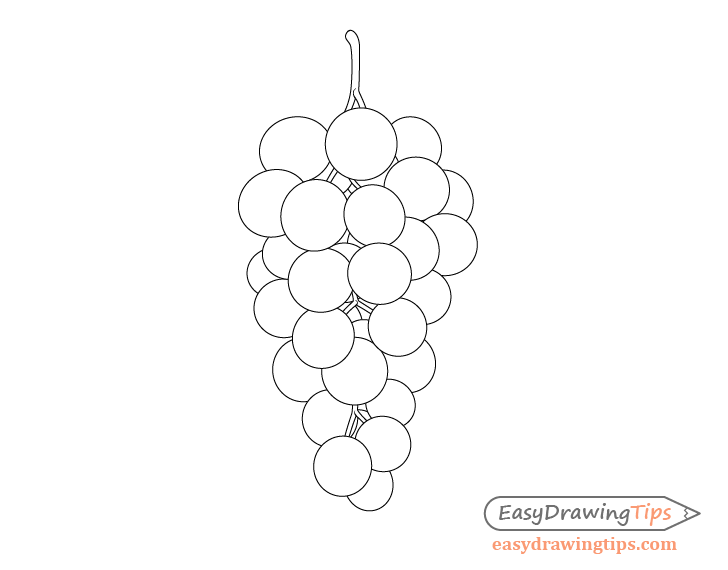
Finally draw the stems. Most of the them will be hidden by the grapes so you can once again draw it in the openings where the grapes are less dense. Draw the stems going behind the foreground grapes but over top of the background grapes. Erase any overlapping parts where you need to.
After you are done you should have a finished drawing of the grape bunch. You can leaveit at that or if you want to go a little further you can move on to the next step.
Step 5 – Sketch the Basic Shape of the Leaves
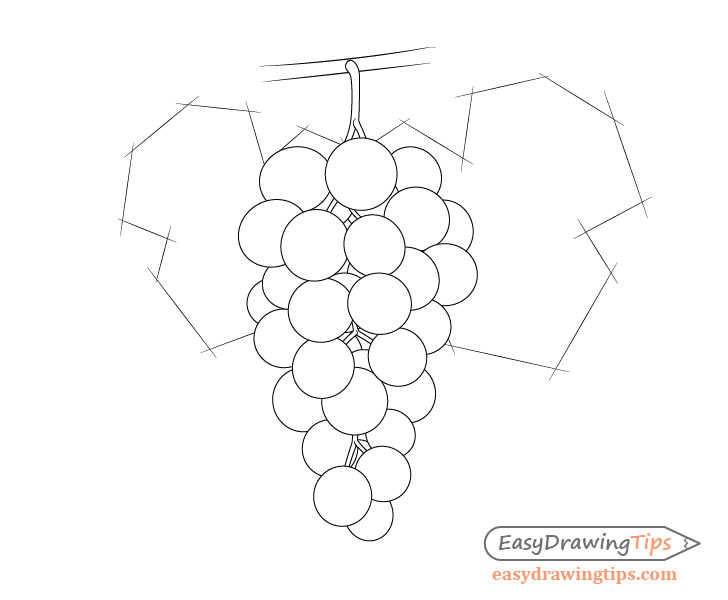
To make the grape bunch look more interesting you can add a pair of grape leaves behind it and a small section of the grape vine above.
Once again use straight construction lines to sketch out the rough outer shape of the grape leaves.
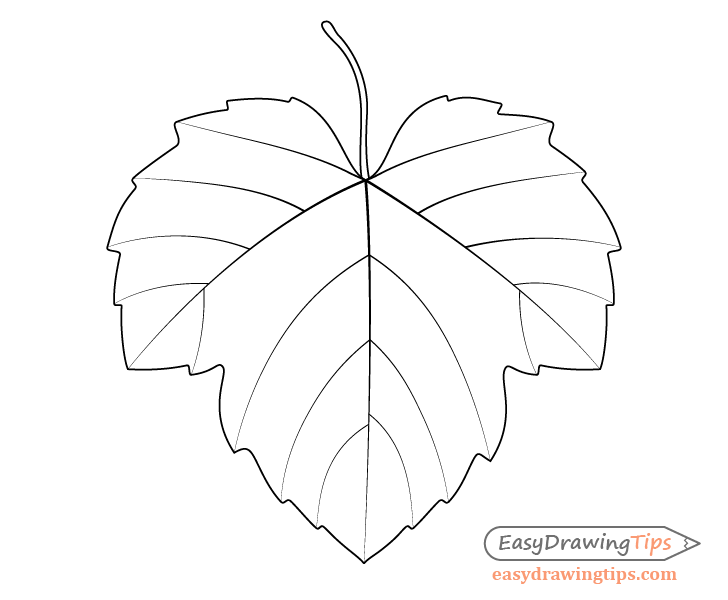
You can see the general shape of a grape leaf in the illustration above if you need something to reference.
Step 6 – Draw the Outline of the Leaves
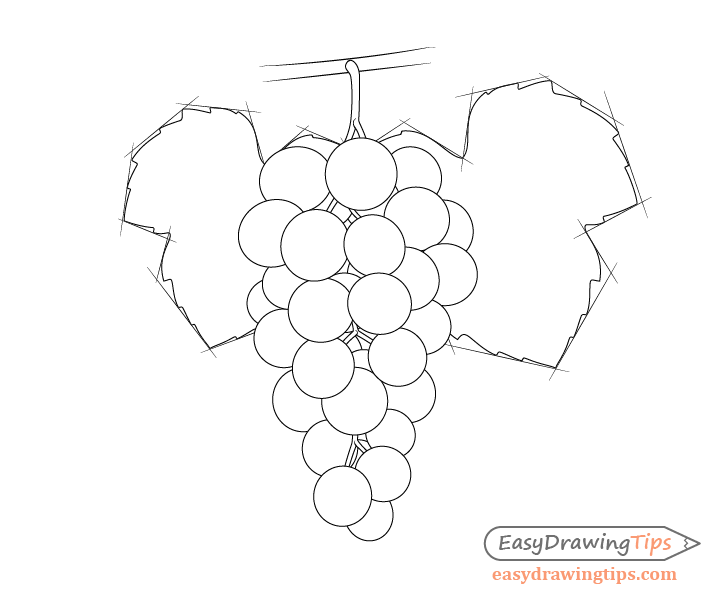
Now inside the straight line framework draw the actual organic shape of the leaves.
Step 7 – Draw the Petioles
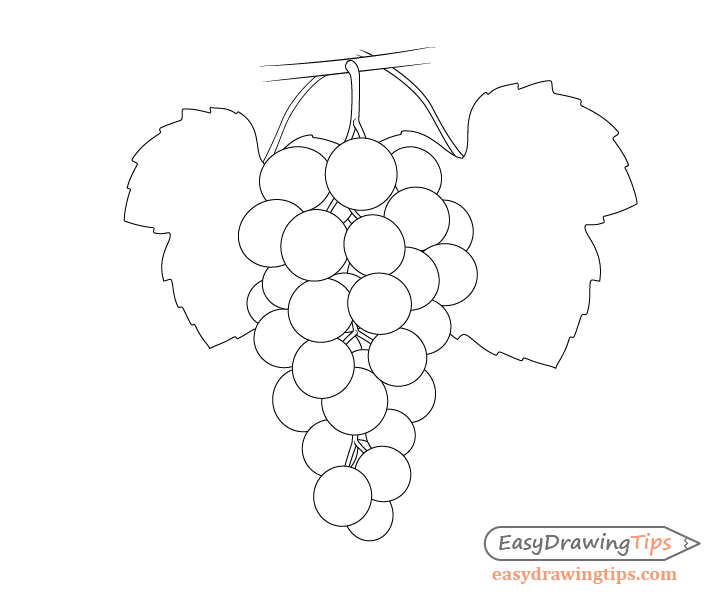
Clean up the guide lines from the previous step and from each leaf project a petiole towards the vine.
Please note that in this drawing technically only the leaf on the left grows from the vine. The leaf on the right comes from a different vine (not shown) so draw it’s petiole going slightly past the vine the left leaf comes from.
Step 8 – Draw the Veins
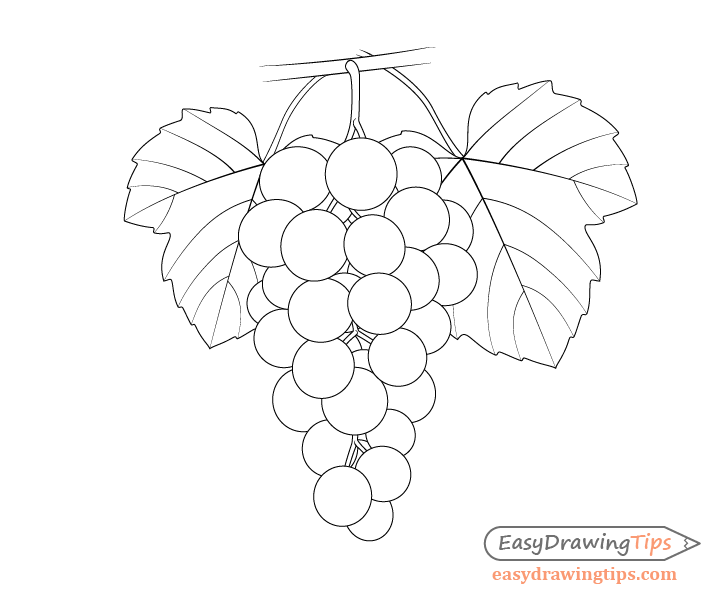
Now inside the shape of the leaves draw the veins branching out in different directions.
You will notice that the leaves have some pointy parts on their edges. Each one of these will usually have a vein going to it’s tip so draw accordingly.
Conclusion
A line drawing of a grape bunch is not very complicated thing to make but adding the leaves can get a little more challenging. Hopefully the detailed breakdown of the drawing step has made it easier for you to follow along.
If you like this tutorial you might also want to try some of the following:
- How to Draw a Peach Step by Step Tutorial
- How to Draw a Tree Branch With Leaves
- How to Draw Grass in 3 Different Ways Tutorial


